Table of Contents
Phonology Lessons
1. Alphabet Work
Letter Naming Flashcards (Phases 0-2)Alphabet Letter Writing (handwriting focus)
3-5 MinutesPhase 1 Instructions
In Phase 1,
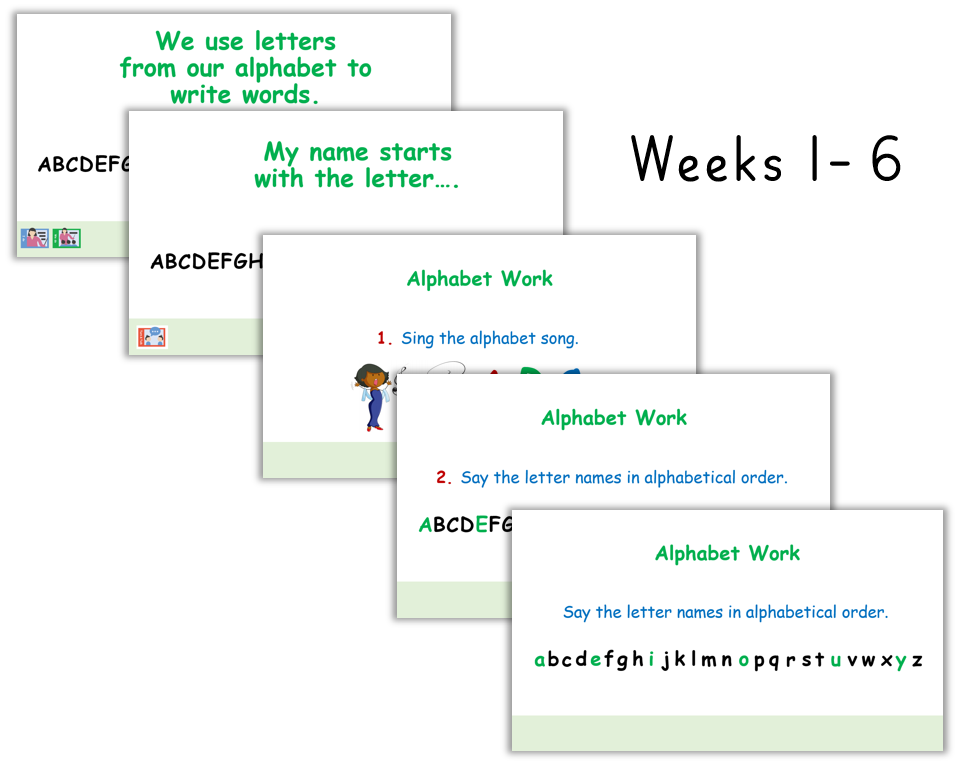
In Weeks 1-6, the slides guide us in introducing students to the alphabet and have them identify the letter their names begin with.
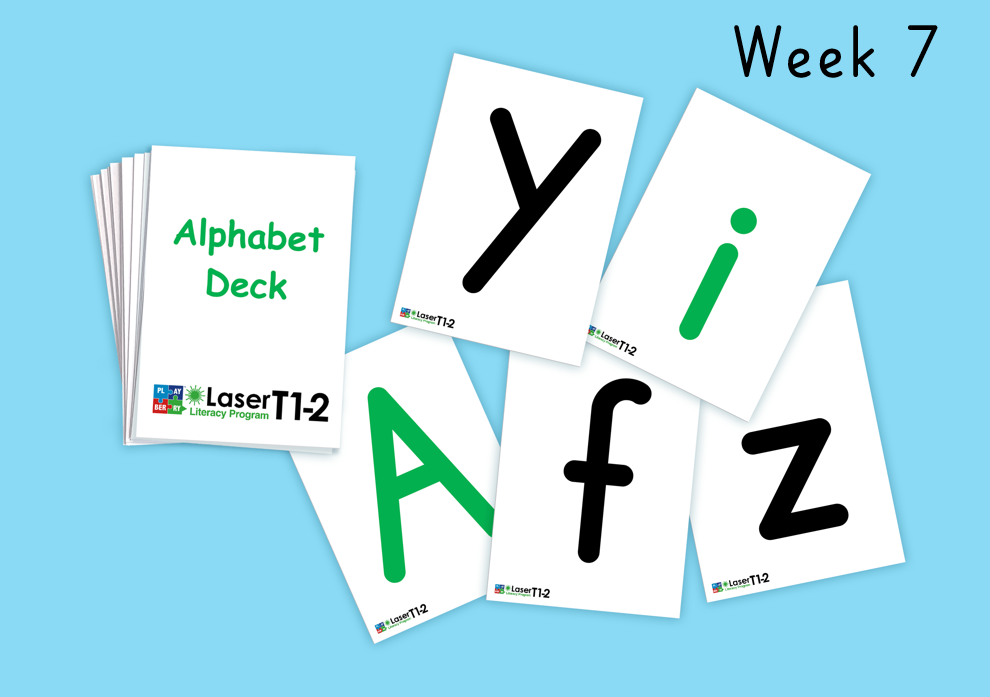
In week 7, the alphabet deck comes out. Students name uppercase letters, then lowercase letters, and consolidate their understanding that the letter’s name stays constant regardless of whether it’s in uppercase or lowercase or the phoneme it spells.
In week nine, it’s time to turn the cards around in the deck, and students name both upper and lowercase letters randomly.
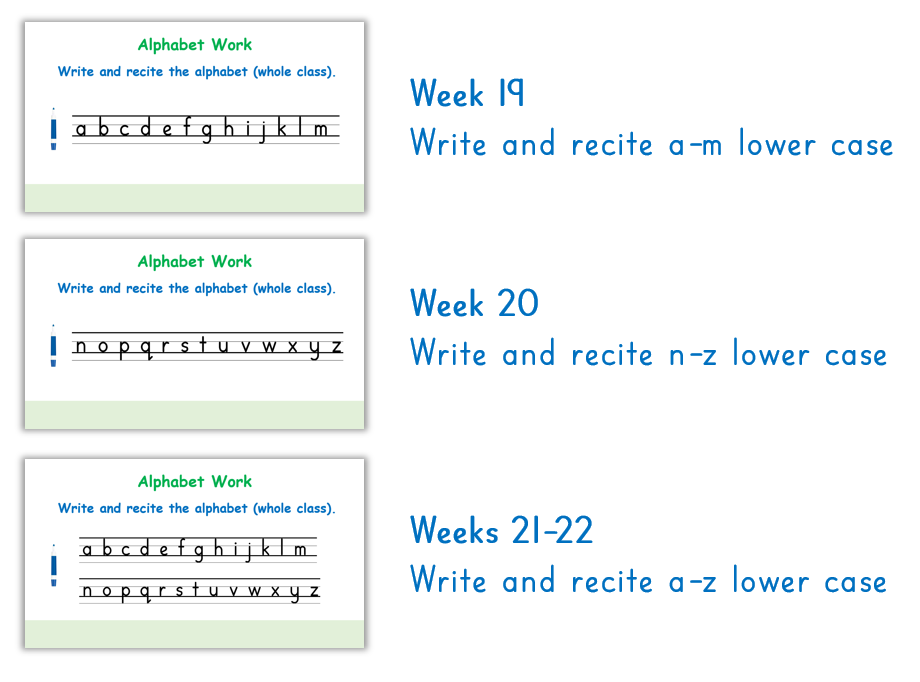
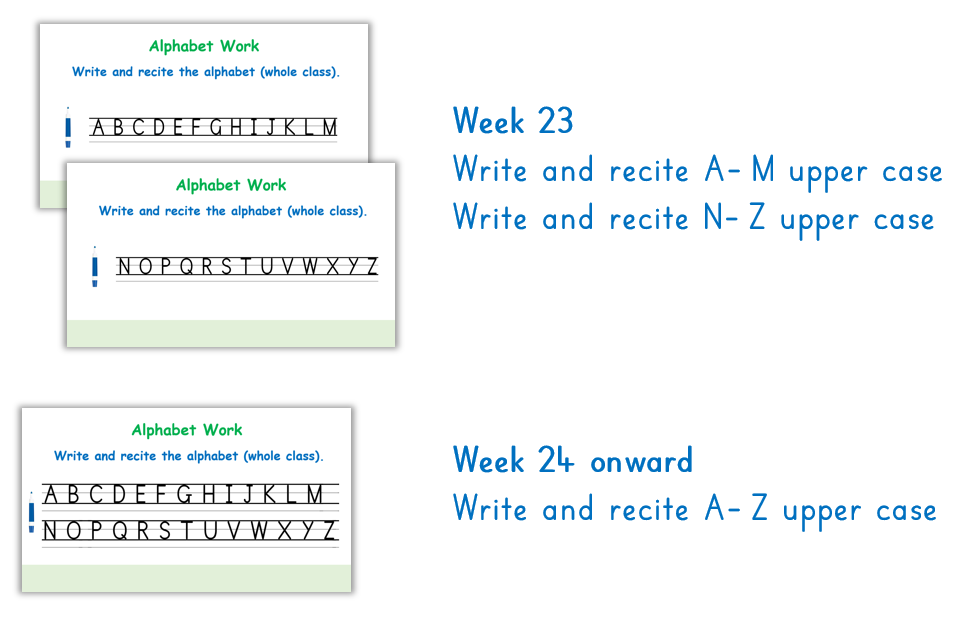
From week 19, students write the alphabet on their mini whiteboards: a-m in lowercase first, then n-z. Here’s where we work on letter formation, starting with lowercase.
By the end of week 22, students are writing the entire lowercase alphabet – a-m on one line and n-z on the next.
In week 23, uppercase letter writing begins, a-m in first, and then n-z after that.
By week 24, students are writing the entire uppercase alphabet – a-m on one line and n-z beneath.
If you’re using a phonological awareness program that includes letter naming, omit the letter-naming section and do it only with the slides (as above).
Let the slides guide you through the alphabet part of the lesson.
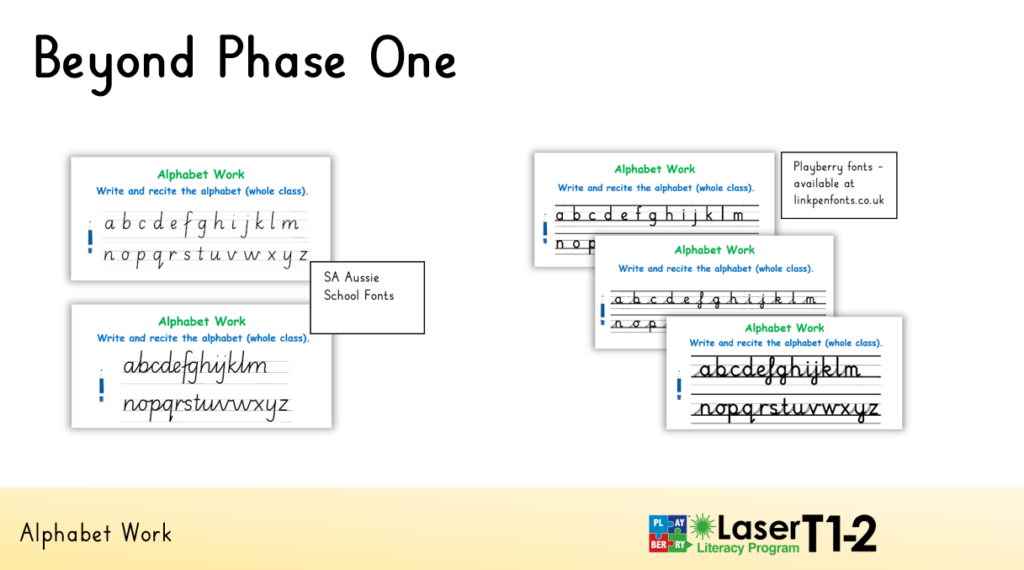
We have included slides with the Playberry and the South Australian Modern Cursive Fonts.
Find the screen with the font which is closest to the one you are teaching and ignore the others.
Follow your school’s guidelines on which fonts it teaches and when it teaches print, kicks, and linked versions of these fonts.
Where to write the alphabet
Students can write the alphabet on personal whiteboards or in writing books. When to use either depends on your purpose. We recommend that students use books at least once weekly.
Routine
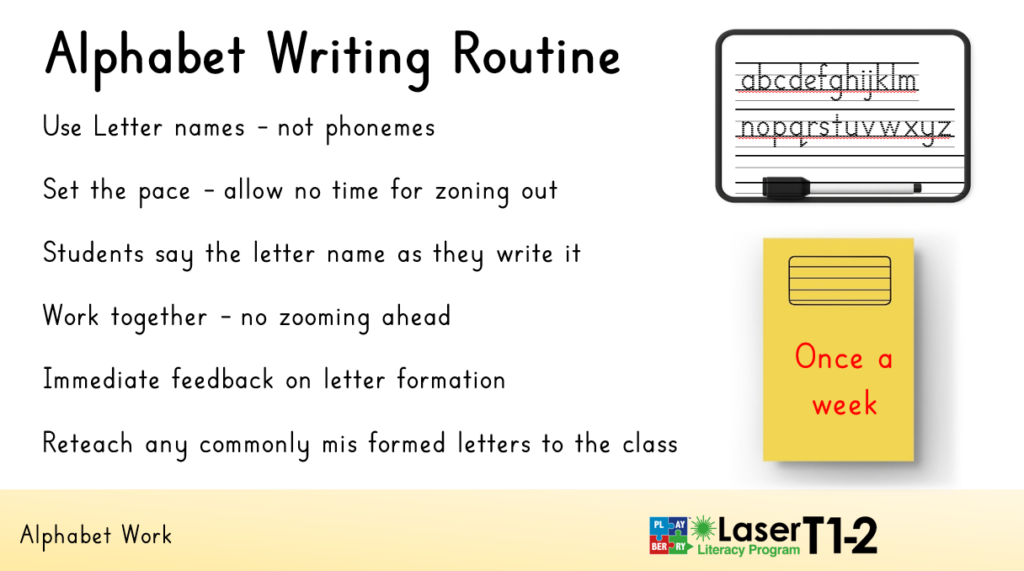
Students write the alphabet (lower case) alphabetically on their personal whiteboard (or book): a-m on one line and n-z on the next. As they write each letter, they name it as a group (chorally).
As the teacher, you:
- set the pace – as fast as possible, as slow as necessary
- quietly correct any incorrect formation, noting incorrectly formed letters
- Select one or two letters to re-teach to the class, modelling letter formation three times – using appropriate language for letter starting positions, etc.
Students practise a row of each letter, circling their best-formed letters. Scan the room, correcting grip and letter formation, and keep a close eye on students who need more support.

Watch Alphabet Routines in Action
Watch Elyse from Star of the Sea School in SA, with her reception (prep) students as they do the alphabet routine.
Watch Christie-Lee from St Francis School, Lockleys, SA, with her Year 4 class as they do the alphabet routine.
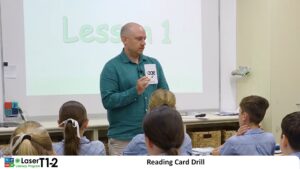
2. Reading Card Drill
Reading Card Review Deck
Phases 1-5, 5 minutes

When you see this slide (above), grab the reading card deck.
These are called ‘reading cards’ because the students read them.
The reading card drill is a fast-paced routine in which students read the grapheme on the front of the card and chorally recite the phoneme (or phonemes) it represents.
Move quickly with this drill. You should be struggling to keep up with the students!
This drill is done each lesson.
Watch the Reading Card drill in Action
Watch Elyse from Star of the Sea School in SA, with her reception (prep) students as they do the reading card drill.
Watch Christie-Lee from St Francis School, Lockleys, SA, with her Year 4 class as they do the reading card drill.
Some cards have multiple phonemes on the back. Which ones should my students be reciting?
The hardest thing for teachers beginning with Playberry laser is to understand which phonemes students need to recite when looking at the grapheme on the front of the card.
This varies depending on where the class is in the program’s scope and sequence.
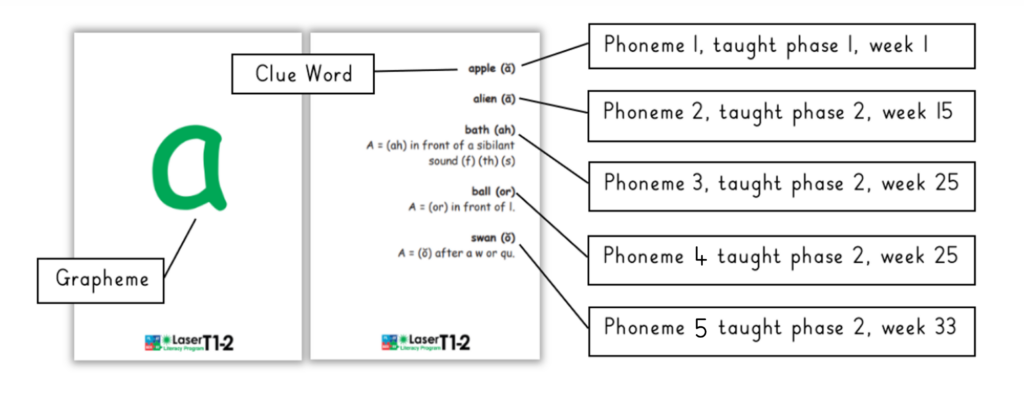
The diagram (above) uses the ‘a’ reading card to demonstrate how the phonemes students recite for each card build up as the group moves through the program.
- If a class has completed week 1 in phase 1, they will recite only the short sound (like in apple) when the teacher holds up the’ a’ card.
- After week 15 in phase 2, students will recite the short and the long phonemes.
- After week 25 of phase 2, students will recite the short and long sounds, as well as the (ah) and (or) phonemes.
- After week 33 in phase 2, students will recite the short and long. (ah), (or) and short ‘o’ phomemes.
This same principle applies to all reading cards with multiple phonemes.
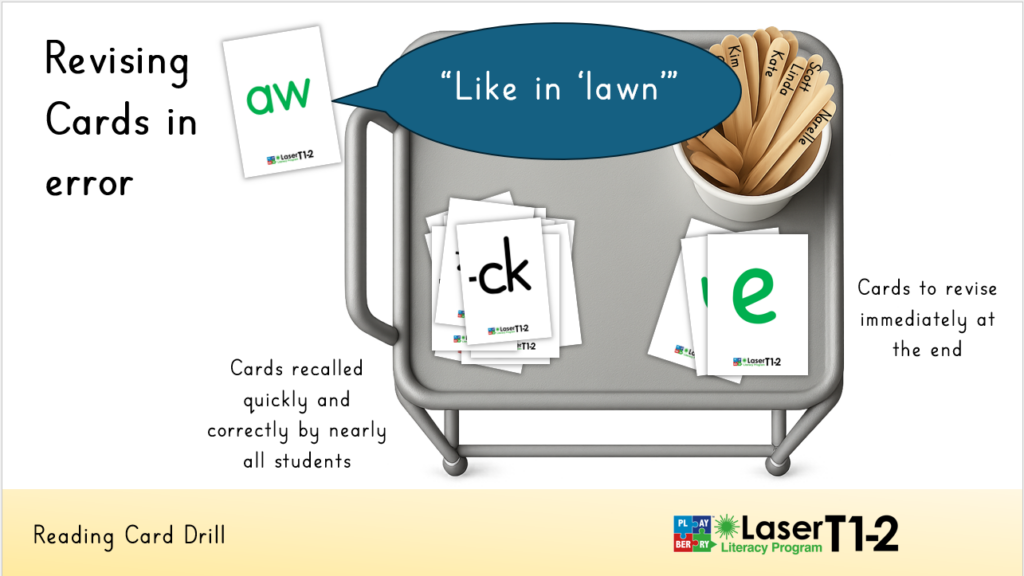
When you hear an error, even if only from one, two or three students, or if the graphemes are read hesitantly by the class, prompt the students with the clue word “Like in lawn” and have them repeat immediately and then pop that card into a different pile from the cards they recalled correctly and quickly. See diagram above
After the deck is complete, pick up the cards you needed to prompt students on (pile on the right) and run through them again.
This two-pile method creates a record of the reading cards students have had difficulty with as a smaller deck. Put these repeated cards at the top of the main deck for the next lesson and start with them, saying to students, “We’ll start with the ones we had some trouble with last lesson”.
Which Cards should be in the deck?
The weekly Planners for Day 1 of Week 1 for each phase show which cards should be included in the deck.
Teachers have discretion over which cards can be removed.
When you teach a new Teaching Point that introduces a new GPC, make sure the card goes into the deck.
Managing the Reading Card deck
Over time, you’ll realise that there are cards in the deck that all students know so well that they can come out of the deck. Here are some ideas about managing the deck.
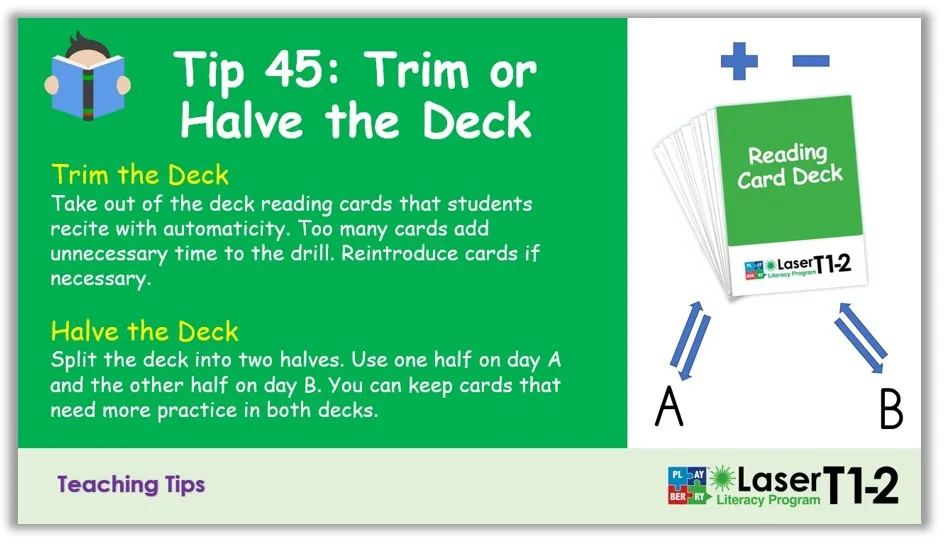
Trim the Deck
Remove reading cards that even your weaker readers can recall with ease. Too many cards will add unnecessary time to the drill. Cards can be reintroduced to the deck if necessary.
Halve the Deck
The reading card deck can be shuffled and split, with one half used on one day and the other half used the next. Keep cards that need more practice in the deck at all times, like vowel cards and cards attached to a spelling rule.
Build a sense of pace
It can feel like you are moving too fast for the class. Aim to bring the class up to a fast pace and keep them there. Otherwise, the pace will slow to a dull pace, and you’ll lose students’ attention and create behaviour problems. All students perform better when a sense of pace is maintained.

3. Rule Revision / Retrieval
Rule Reciting/ Retrieval Activities
All Phases, 3-5 minutes
Once spelling rules and concepts are introduced as a new teaching point, they appear in the Rule Revision / Retrieval section of subsequent lessons for review.
In this part of the lesson, students work from the screen at a lively pace to retrieve and apply the spelling, grammar, morphology, and punctuation concepts they’ve learned.
Watch Rule Revision and Retrieval in Action
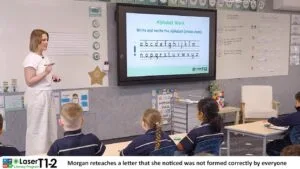
Watch Morgan from Star of the Sea School in SA, with her Year 1 students, as they do rule revision and retrieval. Morgan carefully checks the boards for errors without asking students to chin them.
Watch Christie-Lee from St Francis School, Lockleys, SA, with her Year 4 students as they do rule revision and retrieval. Christie gets students to chin their boards between tasks to check.
The class works chorally when reciting rules and concepts, and on whiteboards or in books when the task requires writing.
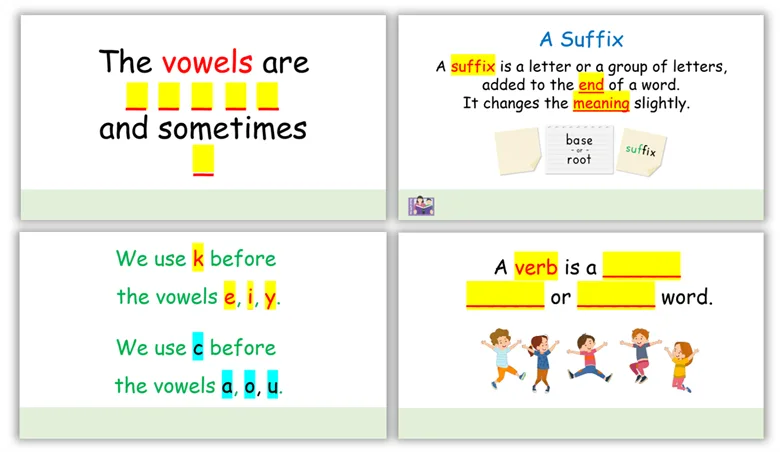
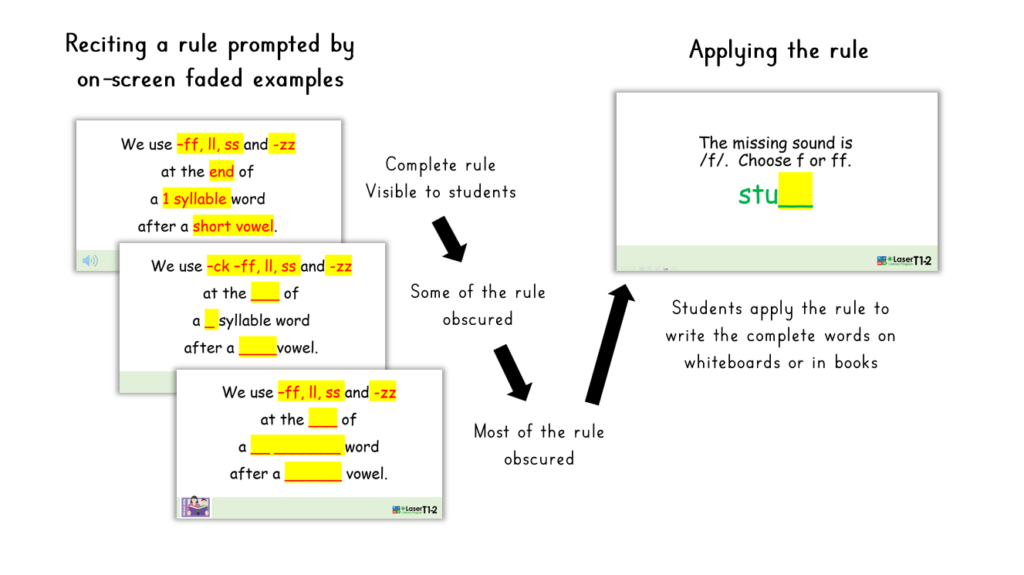
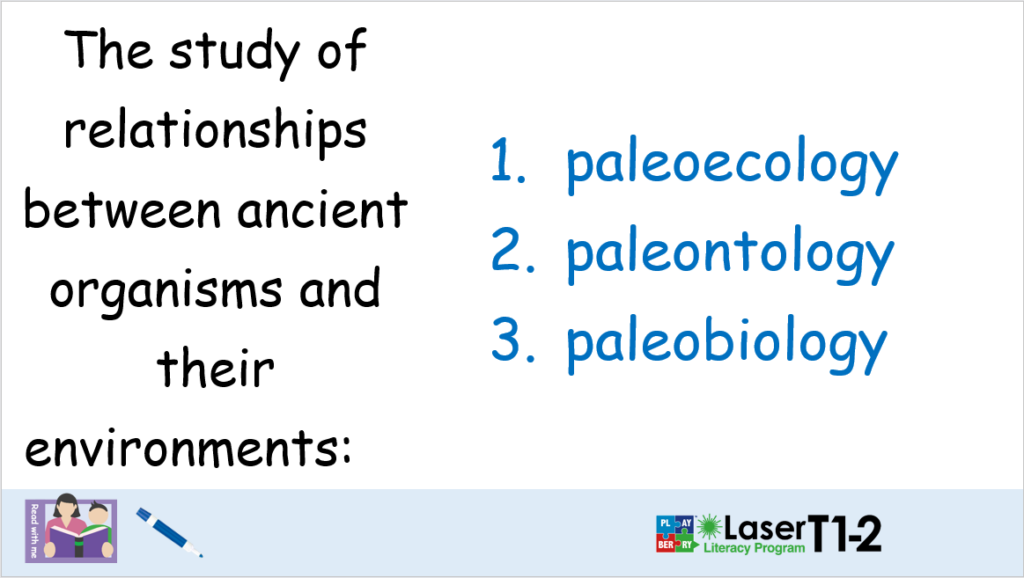
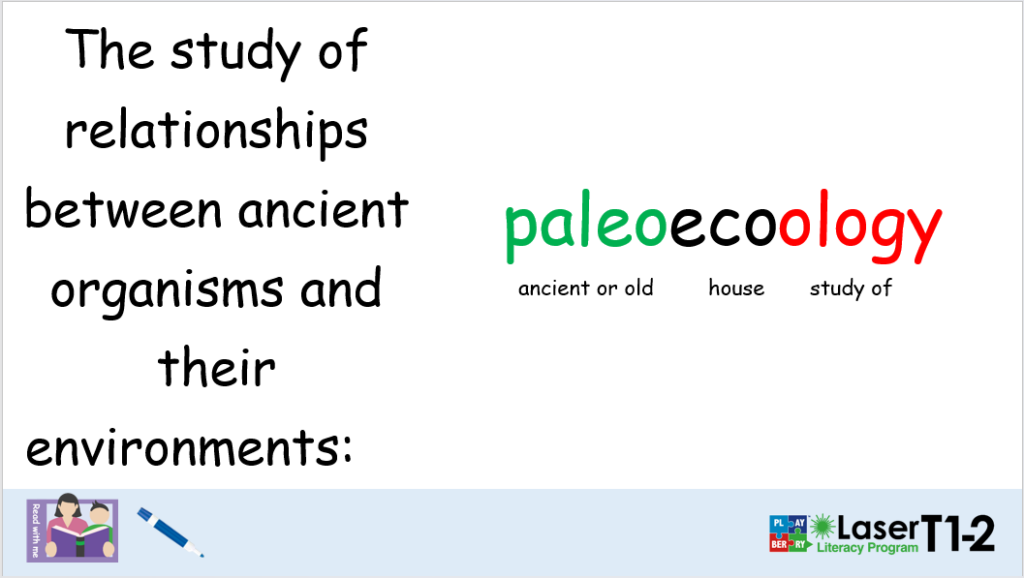
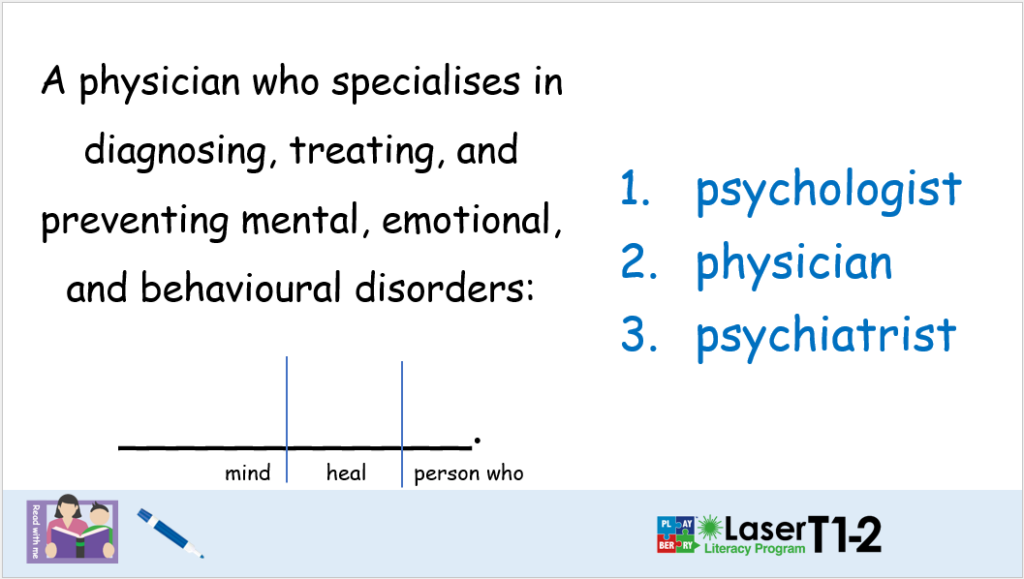
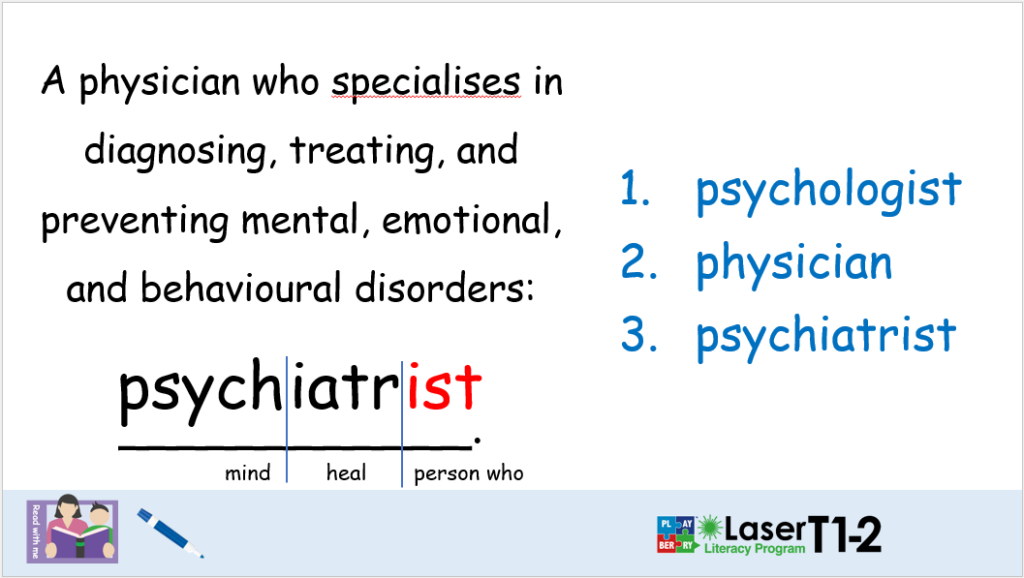
Lesson 1 of each week is a heavy rule-retrieval and revision lesson in which all rules and concept slides taught so far in the phase are reviewed. The slides (see diagram below) begin with the complete rule or definition, then progress to blocking out keywords so students have to retrieve them.
On other days of the week, the slides prompt students to apply the rules or concepts they have learned. Students write whole words or sentences in response to questions on their whiteboards. This gives you feedback on whether the rule or concept has been mastered.
Build a sense of pace in this routine, or student attention will drift.
As soon as students become fluent with the review slides containing definitions and spelling rules, introduce challenges to make them work a little harder to retrieve and/or apply the concepts during the review part of the lesson.
Newsletter 7 contains an article titled “Ratcheting up the Retrieval Effort During Review” that discusses how to introduce more challenge into this part of the lesson to better drive student thinking.
Build a sense of pace
It can feel like you are moving too fast for the class. Aim to bring the class up to a fast pace and keep them there. Otherwise, the pace will slow to a dull pace, and you’ll lose students’ attention and create behaviour problems. All students perform better when a sense of pace is maintained.
4. Spelling Review Drill
Individual Grapheme Spelling Review
Phases 1-5, 5 minutes
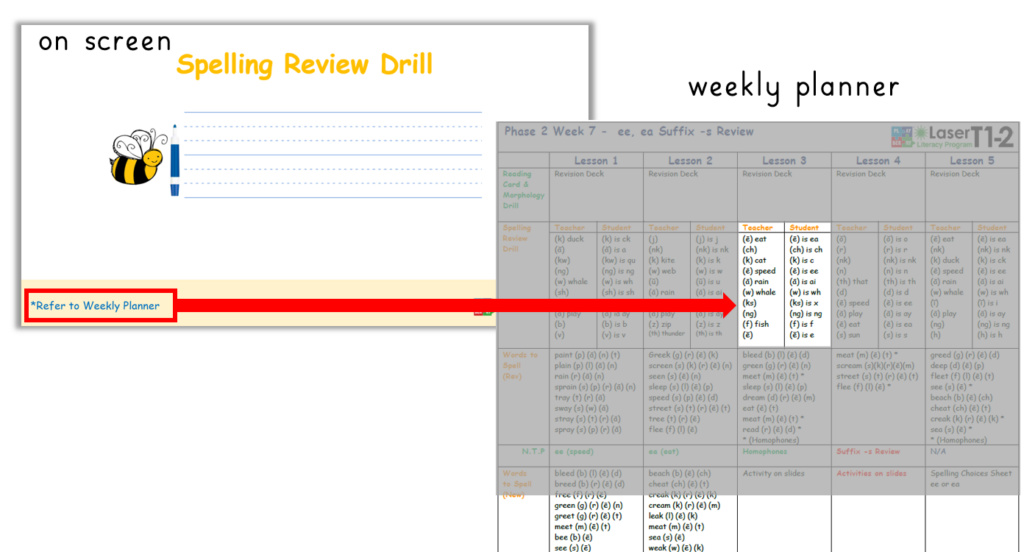
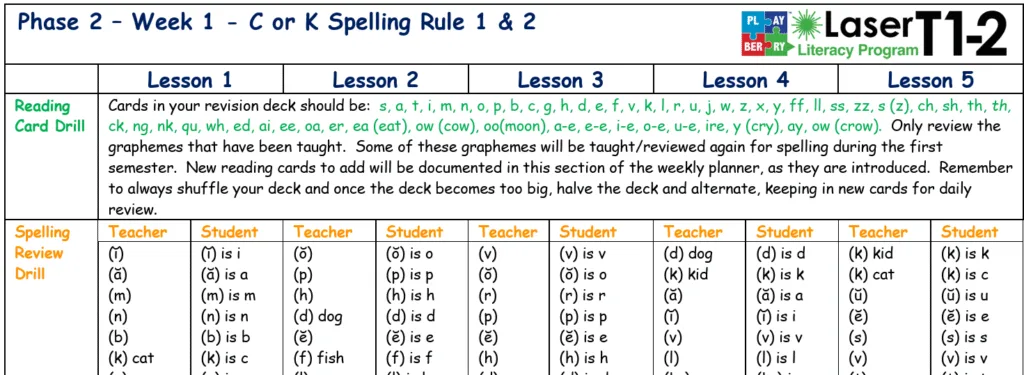
In the Spelling Review Drill, refer to the weekly planner (see diagram above) for the phonemes students are to spell. Students write graphemes on mini whiteboards or in books, depending on the schedule the teacher has created for whiteboard versus book work.
You add or delete graphemes to the weekly planner in this drill based on what you believe students need more or less practice with.
The Routine
For this planner (taken from week 7 phase 2), the routine would run like this:
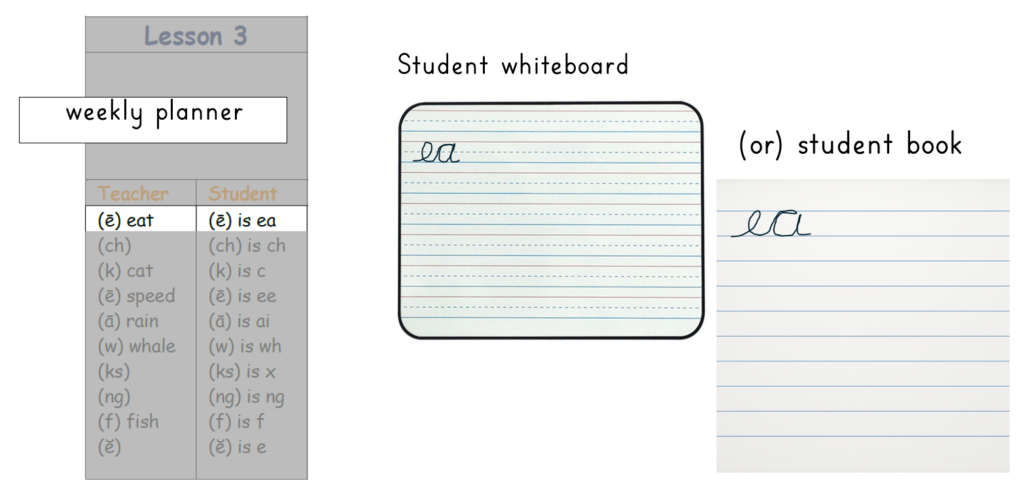
Phoneme 1:
Say to the students “(ē) like in ‘eat’”
Students chorally respond “(ē) is ea” and simultaneously write ‘ea’ neatly on their whiteboards or in their books.
Phoneme 2:
Say to the students (ch).
Students chorally respond, “(ch) is ch,” and simultaneously write ‘ch’ neatly on their whiteboards or in their books.
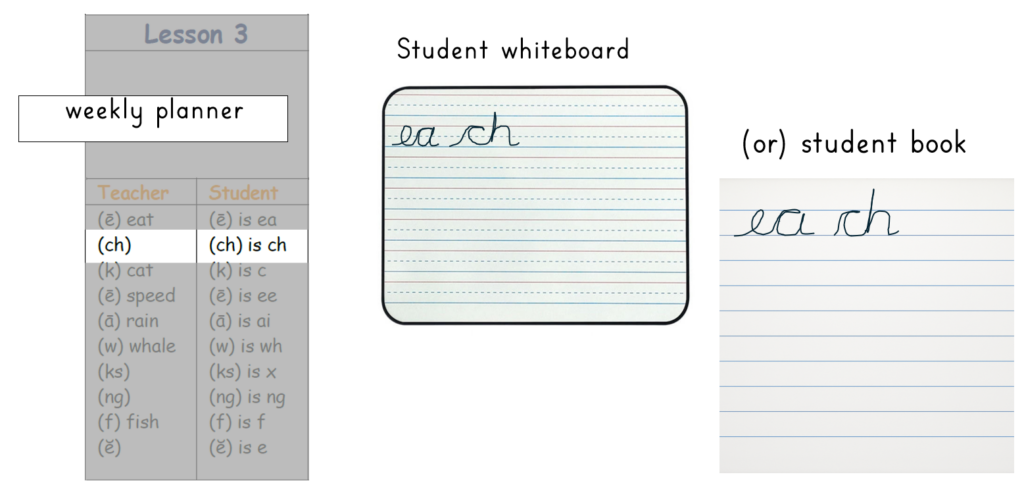
This process repeats for the remaining phonemes on the list. The reason that you use the clue word for the first phoneme:
“(ē) like in ‘eat’”
…is because students at this point in the program also know that the phoneme (ē) is spelt in other ways. (ch) doesn’t have an accompanying clue word because students only have one way to spell it.
Watch the Spelling Review Drill in Action
Watch Morganfrom Star of the Sea School in SA, with her year 1 students as they do the reading card drill.
Watch Christie-Lee from St Francis School, Lockleys, SA, with her Year 4 class as they do the reading card drill.
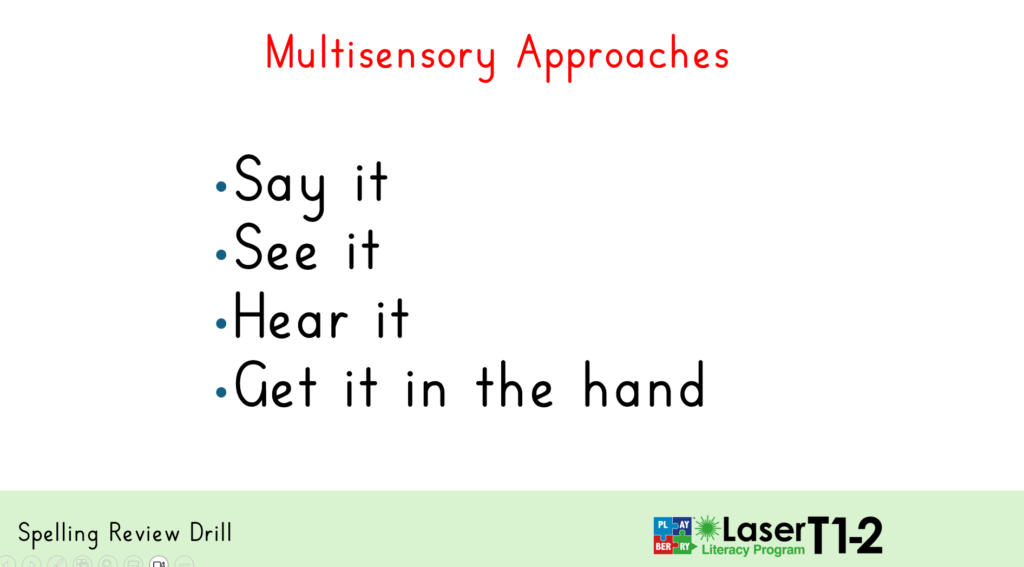
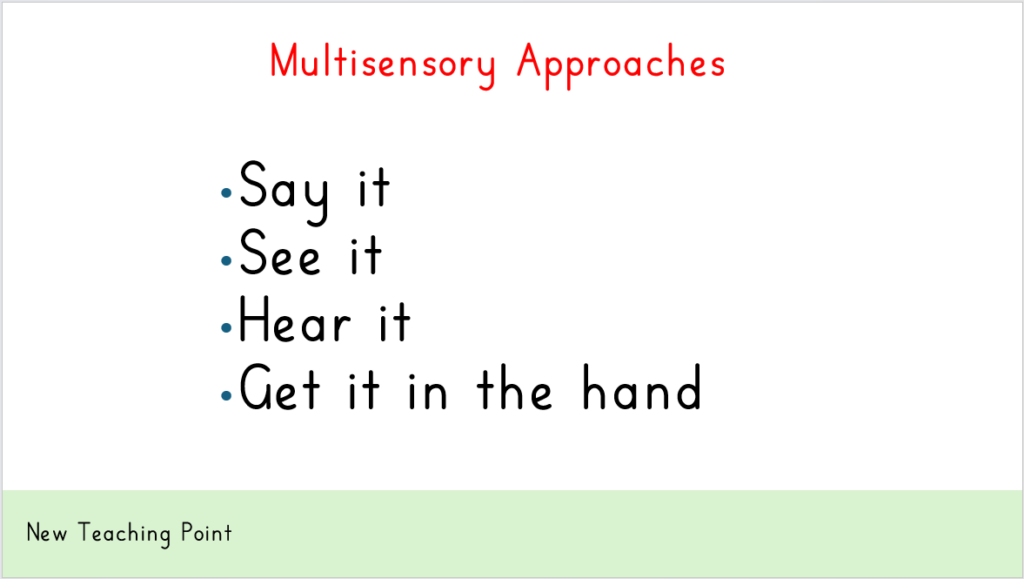
Insist on the Multisensory Routine
NEVER allow students to do this routine quietly!
Having students repeat the phoneme, say aloud the grapheme(s) that spell it, and only then write the grapheme(s) is a multisensory routine that creates neural links among the phoneme, its grapheme (s), and the muscle memory for writing them. In other words, we want students to say it, see it, hear it and get the feel of the written graphemes into their hand.
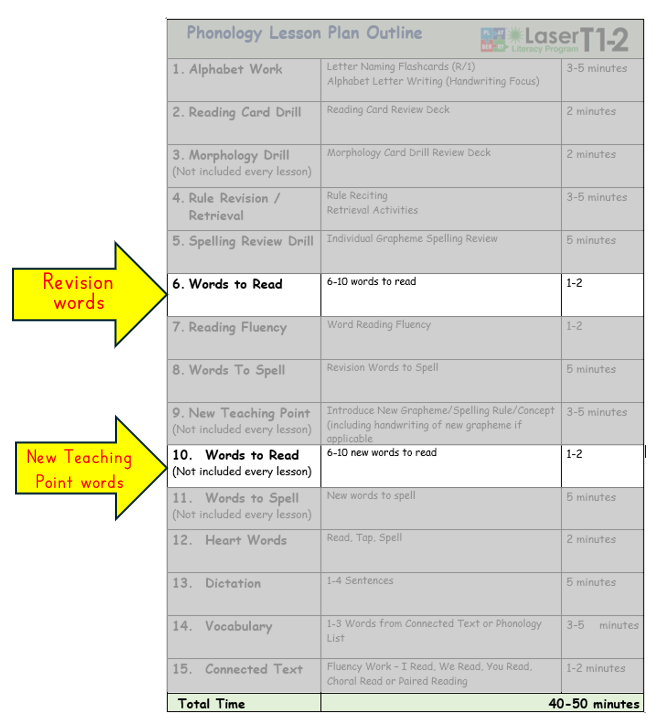
5. Words to Read
All Phases, 5 minutes
Words to read come twice in a lesson. Students read 6-10 words chorally from the screen. Words to read is a whole-class choral read of words that appear on the screen.
There are two sets of words to read in a lesson – the first set is a revision of words from the previous teaching point, and the second set is from the new teaching point.
Students read these words from the screen to the best of their ability.
Students must keep their eyes on the words on the screen, even if they can’t read them all yet. We want all students to look at the words as they say or hear the rest of the class say the word.
Watch Words to Read in Action
Watch Elyse from Star of the Sea School in SA with her reception (prep) students as they work on words to read.
Watch Christie-Lee from St Francis School, Lockleys, SA, with her Year 4 class as they work on words to read.
In phases 0 and 1, slides have built-in animations for additive blending to help students develop their blending skills. Use the clicker to control how quickly new graphemes appear to students.
EDITING NOTE 21/7/2026:
The video of Elyce’s Year 1s (above) shows ‘segmented phonation’, where the students say the phonemes in a segmented way e.g:
“/p/ /ĭ/ /n/ /z/ → pins.”
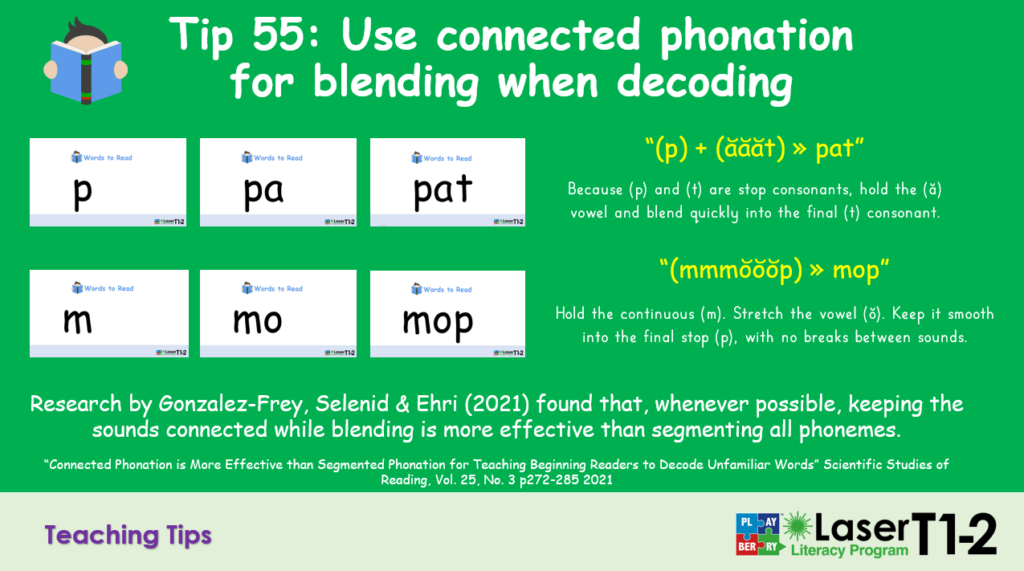
We’ve recently come across research (Gonzalez-Frey, Selenid, and Ehri, 2021) showing that it’s more effective to use ‘connected phonation’:
“pĭĭĭnnnzzz → pins.”
At the time of filming, we weren’t aware of this research.
As students progress through the lessons, the chunks that the letters appear in change so that common consonant blends arrive together like the ‘nk’ on the end of ‘plonk ’. Use a pointer to help students blend or use a piece of card to hold over the screen to cover and uncover letters as you blend them with students.

6. Word Reading Fluency
Revision Words
Phases 1-5, 5 minutes
The task for the students here is straightforward – to read these revision words from the screen at a good pace. Yes, like all routines, it is pace that will hold student attention.
As soon as possible, fully release students to read words on their own. If they’re not doing the reading, they’re not orthographically mapping them.
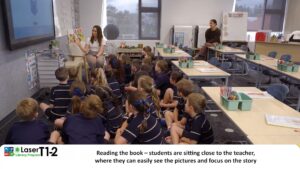
Weaker readers (front row) won’t have orthographically mapped all the words, so their job is to track the words as they’re read by the class.
In the reception video below, you’ll see an “I do – we do” progression; however, Elyse makes sure the students read the rows independently during the ‘we do’.
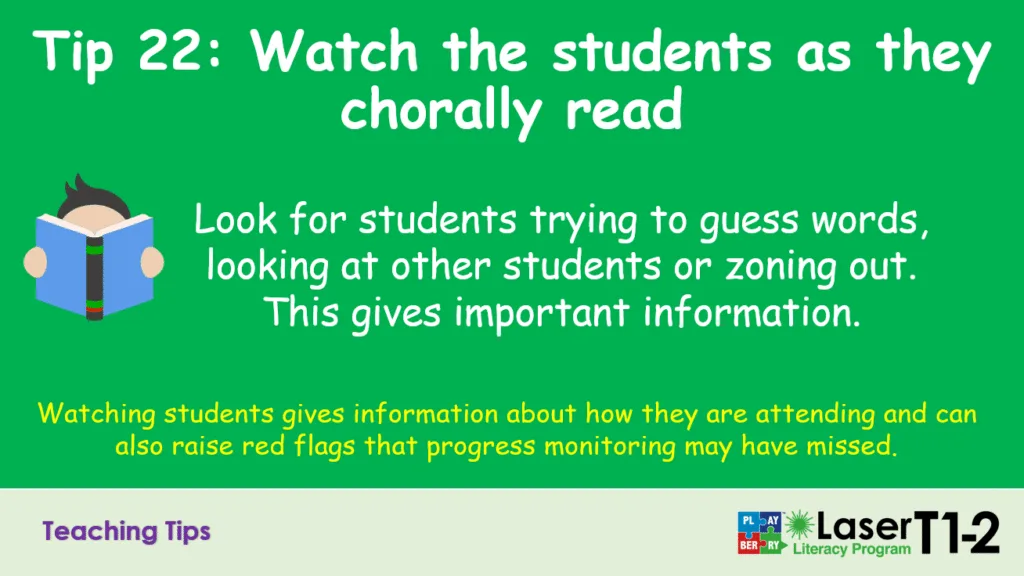
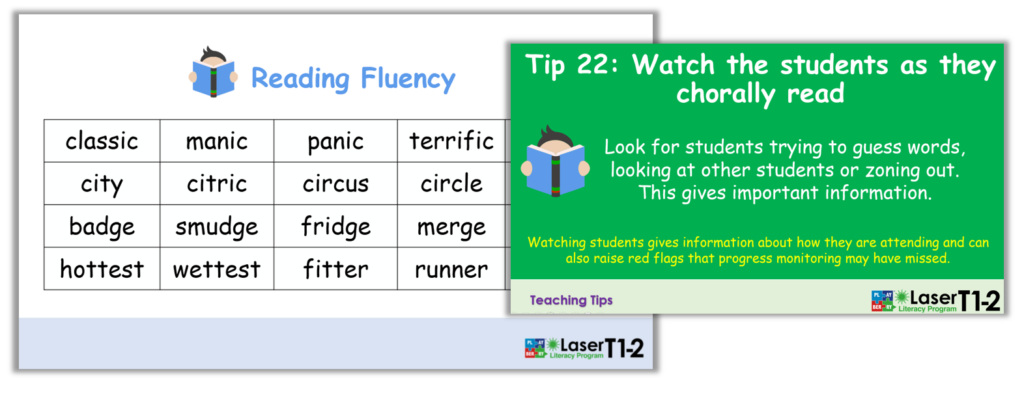
Whenever possible, your eyes are on the students, checking (and prompting) for 100% participation: students either read the words aloud or track the words if unsure. You’ll wll need to glance at the screen to guide reading and maintain pace, but whenever possible, watch the students as they read from the screen.
We want students to read the words in an upbeat, high-energy way. Please insist on full engagement from all students and allow no passengers. Everyone has a role to play because choral reading is designed to support all learners. We want your class to have a team culture, and teachers’ expectations are always central to whether this culture develops.
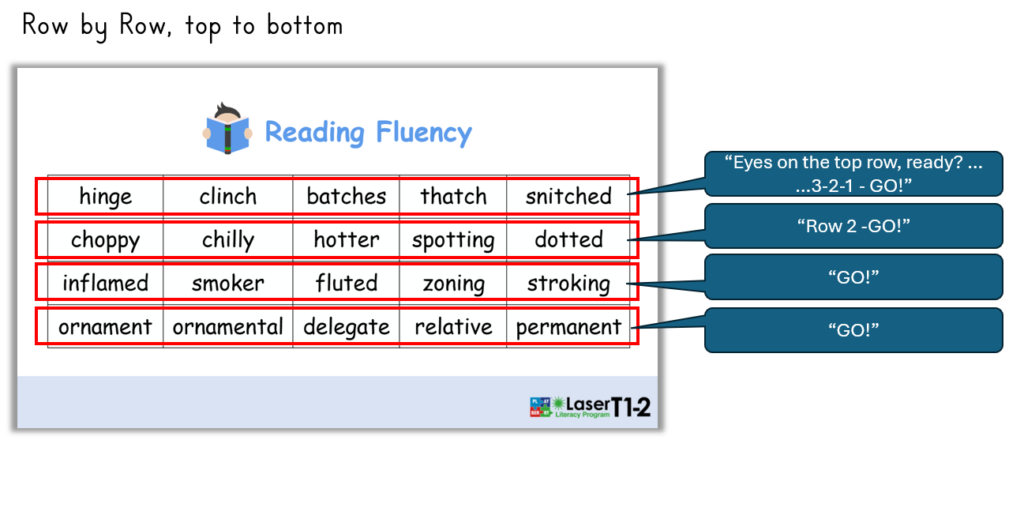
The most obvious way to have your students read these words is left to right and row by row
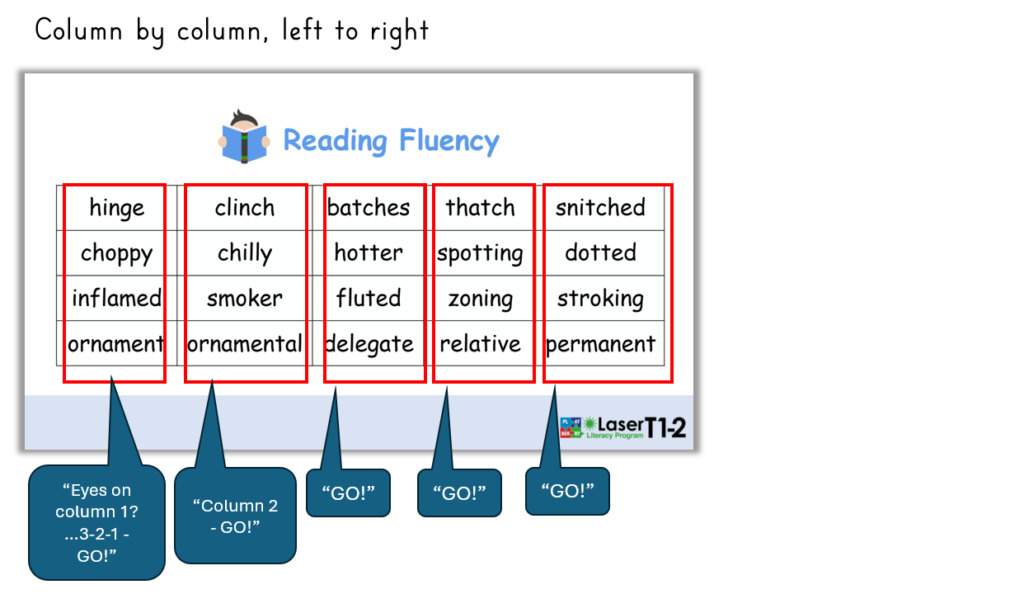
You can also direct students to read the words in columns to mix things up a little. Doing this will take the words out of their weekly families and make students pay closer attention.
Make sure you are standing back and out of the way from the board so you aren’t in the way.
Making sure all students start together on rows or columns keeps the group reading chorally.
When words are misread
If you hear a few students (even just a couple) misread a word, stop and read it to the class. Once you’ve read it correctly, direct the students to re-read it with you (we do), then have the class read it once more without you (you do) before reading on.
Once all words have been read, you have the option to point at any problem words and get the class to read them again a few more times. This additional practice will be harmful to none, important to many, and essential to a few of your students.
Watch Word Reading Fluency in Action
Watch Elyse from Star of the Sea School in SA, with her reception (prep) students as they do the reading word reading fluency.
Watch Christie-Lee from St Francis School, Lockleys, SA, with her Year 4 class as they do word reading fluency.

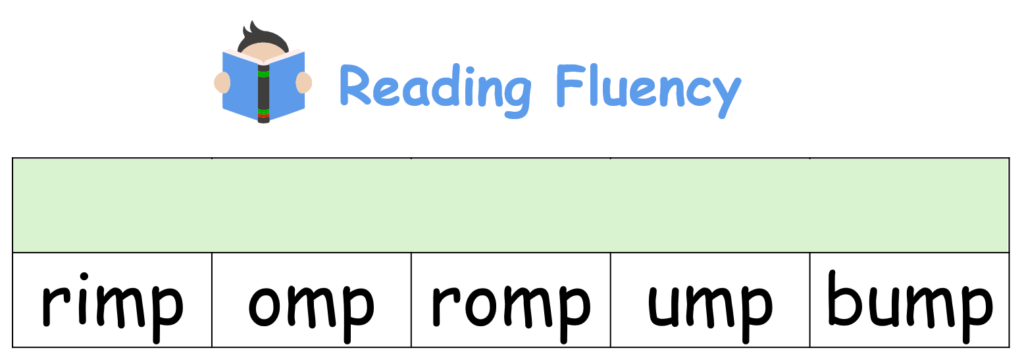
This is a reading fluency slide from Phase 1. Notice that one of the rows is covered, leaving only the top row visible to students. This is designed to help students focus more effectively on words.
Younger eyes tend to get lost in a sea of words, so this will help you maintain better attentional control over where students are looking to maximise participation.
Simply click to view the next row.
7. Words To Spell
All Phases, 5 minutes
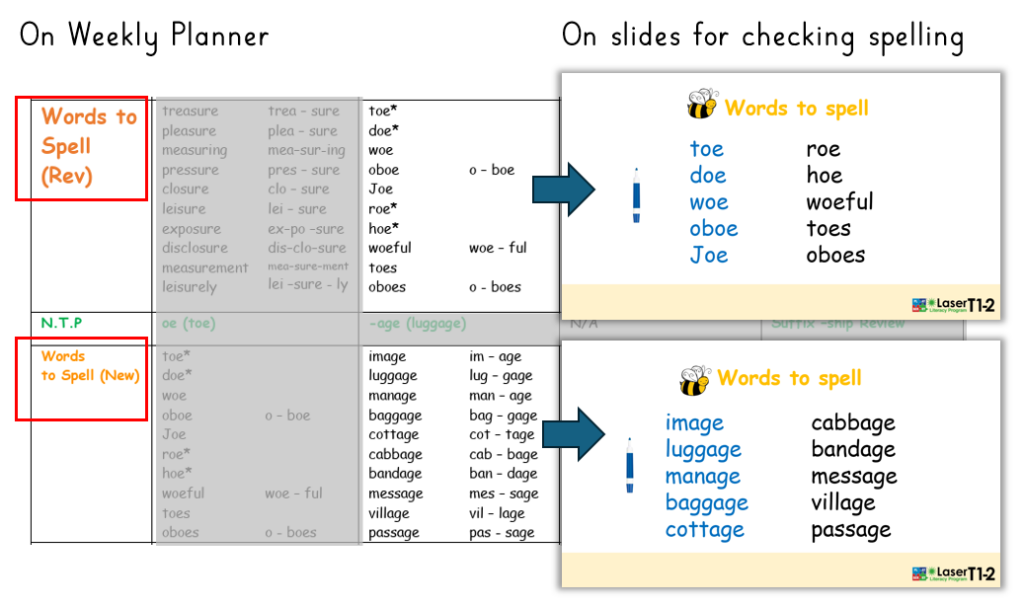
Words to spell are in the weekly planner.
There are two sets of words to spell, during a lesson when a new teaching point is taught – a set of review words before the new teaching point and a second set following the new teaching point. You will see two sets on the weekly planner. There are only review words in lessons with no new teaching points.
Upon completing each set of words to spell, students will refer to the screen to check their spelling against the words on the slide. Please make sure this slide is not on screen while students are spelling words.
There are a few ways students check words at the end:
- a ‘tick or fix’, where students check words on their whiteboards against the words on the screen. If a student has spelt a word correctly, they tick it. If they have made an error, they rub out the entire word and rewrite it.
- Draw a pop-stick, or cold-call students to spell a word aloud (make sure the word is correct on their board first) while the other students check their spelling (see the end of both videos).
If students are working on mini whiteboards, we don’t want them to just erase the misspelt part of the word; we want a full recode, so they practice spelling the entire word.
The recode routine is one you will have to insist on, because it is faster for students to just replace the misspelt part of the word, but it doesn’t help much.
Once the tick and fix is completed, students chin their boards for you to scan.
Watch words to Spell in Action
Watch Morgan from Star of the Sea School in SA, with her Year 1 students as they do Words to Spell.
Watch Christie-Lee from St Francis School, Lockleys, SA, with her Year 4 class as they do Words to Spell.
Spelling Routines in Early Phases
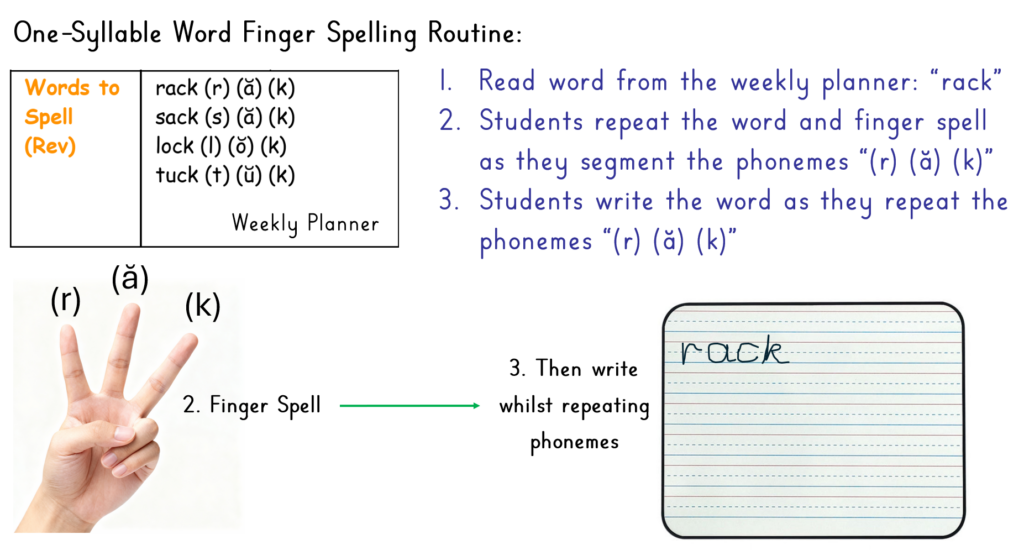
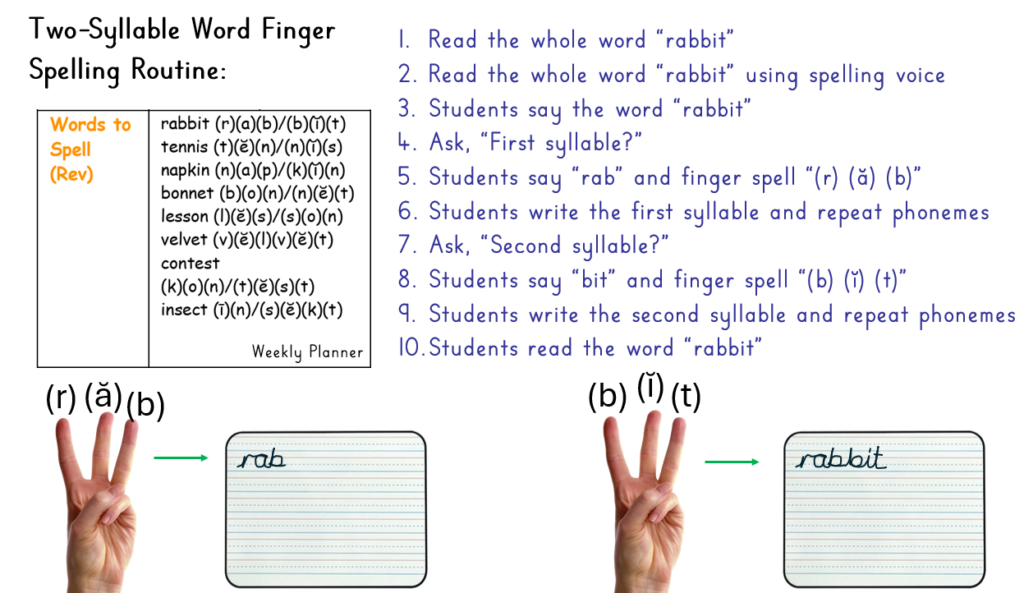
Using Spelling Voice
The second syllable of ‘rabbit’ has something strange going on. It’s to do with how we say the vowel phoneme, which complicates how it needs to be spelt. It’s got the schwa vowel – the ‘grunty’ (eh) phoneme that gives no clues as to how to spell it. This is why students must overarticulate (use spelling language) for the letter ‘i ‘ in ‘bit’. It has to be said as the short sound.
If you follow the coding on all of the words in the Weekly Planner, the spelling language is done for you.

Spelling Routine in Higher Phases (Phase 4 up)
Students move from finger spelling to syllable-by-syllable spelling. With the word ‘treasure’, students
- Spell ‘trĕ’ with its ‘ea’ spelling in one chunk
- Spell the ‘sure’ spelling of (zher) in one chunk
Students will be at different stages in their ability to do this with more complex GPCs, so return to finger spelling if needed, either with the entire class or with a group of students who need it.

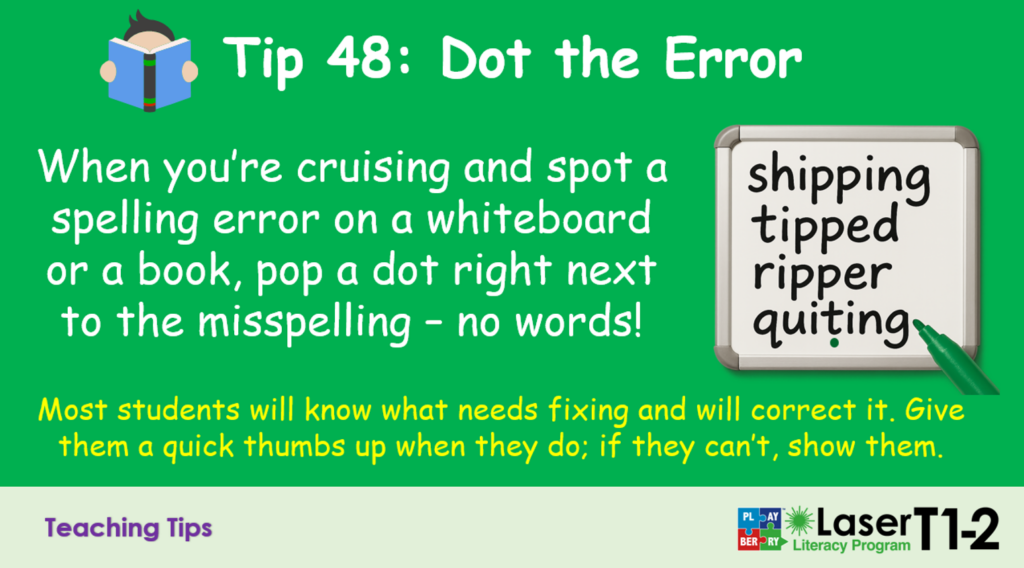
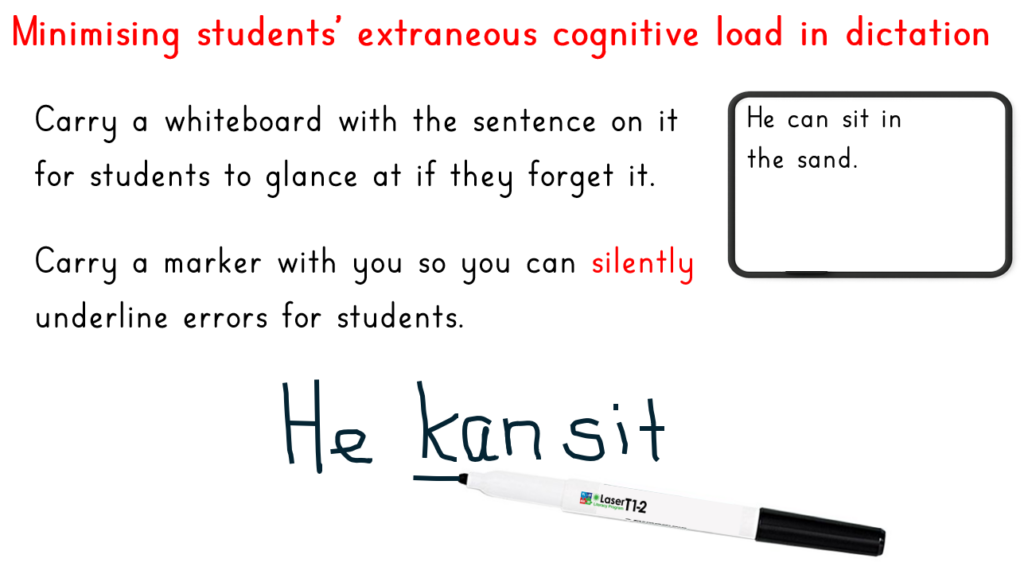
As you circulate during words to spell, you can point out errors to students. Correcting errors loudly while other students are working creates unnecessary extraneous cognitive load. If you notice an error on a student’s whiteboard, direct their attention to the error with your marker, write the correct spelling above their error, and whisper, ‘Your turn. Teach students that if you pop a dot on a word, it indicates they’ve used an incorrect spelling and need to rewrite the word.
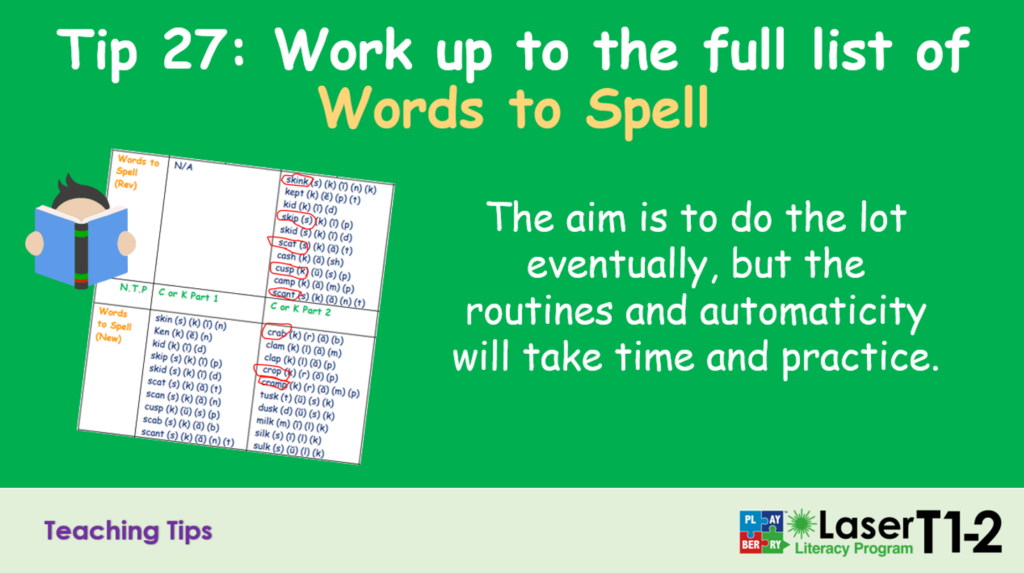
When you begin, especially if it’s the class’s first year with Playberry Laser, previous GPCs and spelling rules taught in previous phases may not be well established, meaning that you might need to reduce the number of words on the list. The goal is to get to the entire list, but this may take a little time. Keep your expectations both high and realistic.
You can also manually include other words that need more practice.

8. New Teaching Point (not included in every lesson)
Introduce new Grapheme / Spelling Rule / Concept
(including handwriting of new grapheme if applicable)
All Phases, 3-5 minutes
Teaching Point is the name we give to the new ‘thing’ being taught from the scope and sequence. This can be the next GPC (Grapheme phoneme Correspondence), the next spelling rule, the next morpheme (prefix, suffix, base or root), or the next grammar concept.
Teaching a new teaching point well requires that you rehearse beforehand and carefully consider how you will use the slides, your own models, and your words to deliver clear, memorable explanations. You’ll soon see in the videos well-prepared teachers giving clear explanations and students following clear learning routines, and checking for understanding at optimal moments, all with the goal of keeping students’ cognitive load at a level that optimises learning.
Teaching a new teaching point unprepared can cognitively overload students as you bumble between examples you haven’t used before, miss connections between concepts, fail to repeat important vocabulary, and use too many words in your explanations.
To help with new teaching points, we have embedded voice recordings with clear language and directions for you to use with students. We want your own voice, but the recordings can help you with what to say and when to say it.
Not all teaching points are the same, and preparation and rehearsal are key to delivering clear, well-explained teaching points and to effective student practice following these explanations.
New Teaching Point -New Grapheme-Phoneme Correspondence (GPC)
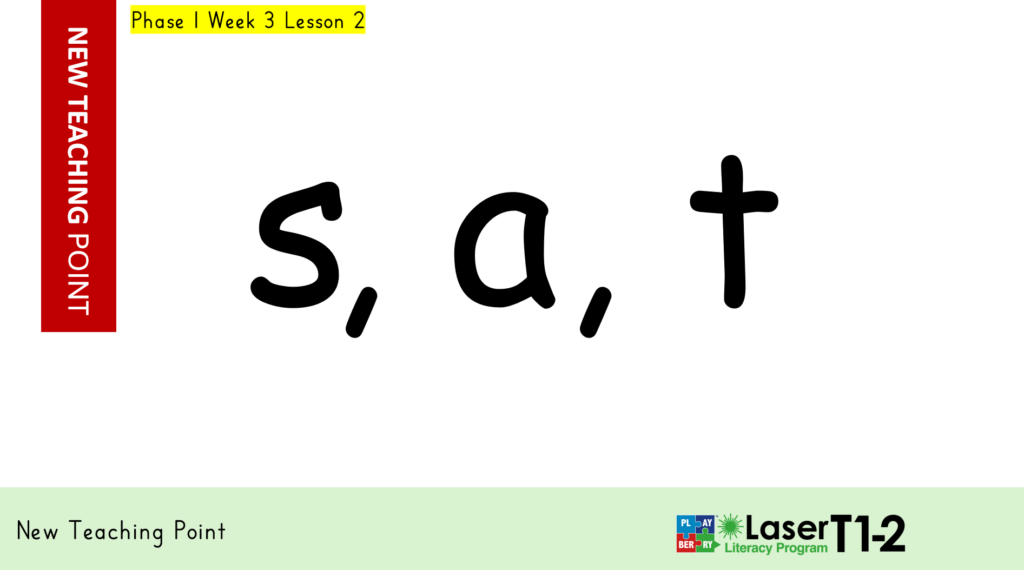
Week 3 of phase 1 explicitly teaches three GPCs:
- The grapheme S making the (s) phoneme
- The grapheme A making its short (ă) phoneme
- The grapheme T making the (t) phoneme
These are taught explicitly alongside handwriting as part of a multisensory routine, so students can get these GPCs into their hands as quickly as possible. We will examine only the teaching progression for introducing the grapheme ‘S’. ‘A’ and ‘T’ are the same.
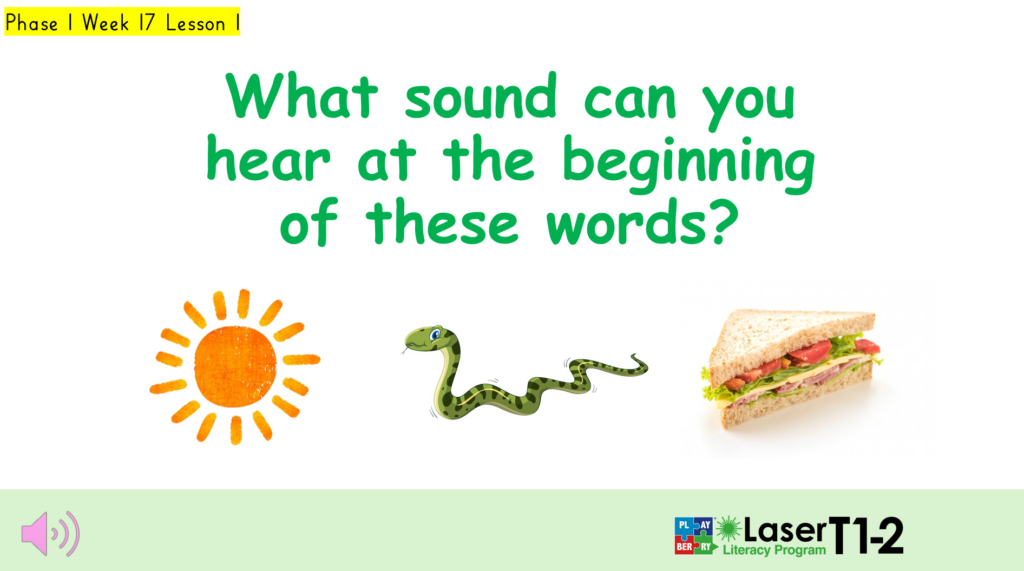
Make sure students know they are looking at ‘sun’, ‘snake’, and ‘sandwich’. Point to the pictures and name them, or do an “I do – we do” by pointing to the pictures and asking:“What sound can you hear at the beginning of these words? Let’s say them first. Say after me… sun …. snake … sandwich”.
Alternatively, you can play the embedded recording of Linda’s voice to do this bit for you.
The next step in the teaching sequence is to take students from speech to print. The routine is critical. We want students to:
- say the phoneme, and simultaneously…
- write the grapheme that spells it,
Model the letter formation and multisensory routine clearly in an ‘I do,’ and then it’s time for students to repeat the same routine at least 3 times on whiteboards or in handwriting books.
Just as you did, the students will say:
(s) is ‘s’
The embedded audio file (click on the slide) tells you exactly what students need to do and what they say.
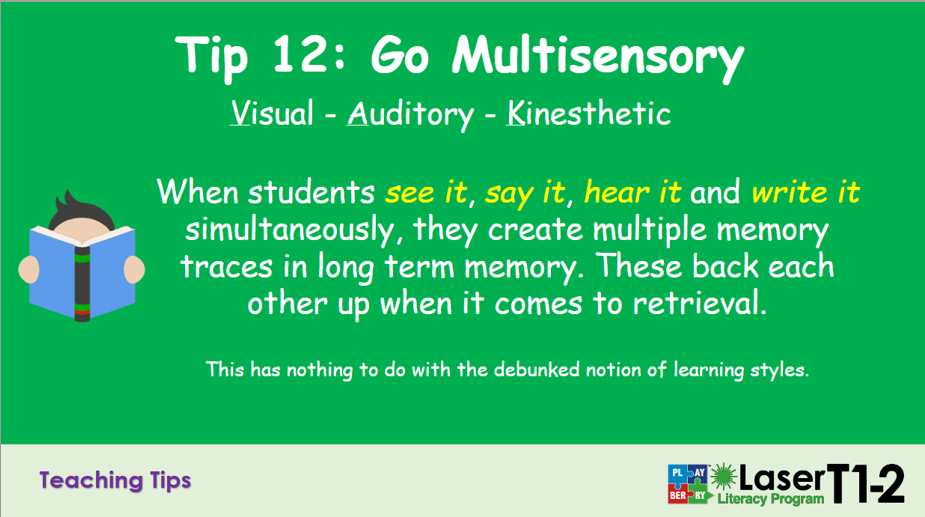
Saying the phoneme as they form the grapheme creates a multisensory link between language and motor representations of the GPC. This is multisensory learning.
As students do this, circulate and correct misformed letters and pencil or marker grips.
New Teaching Point - Spelling Rule/Concept
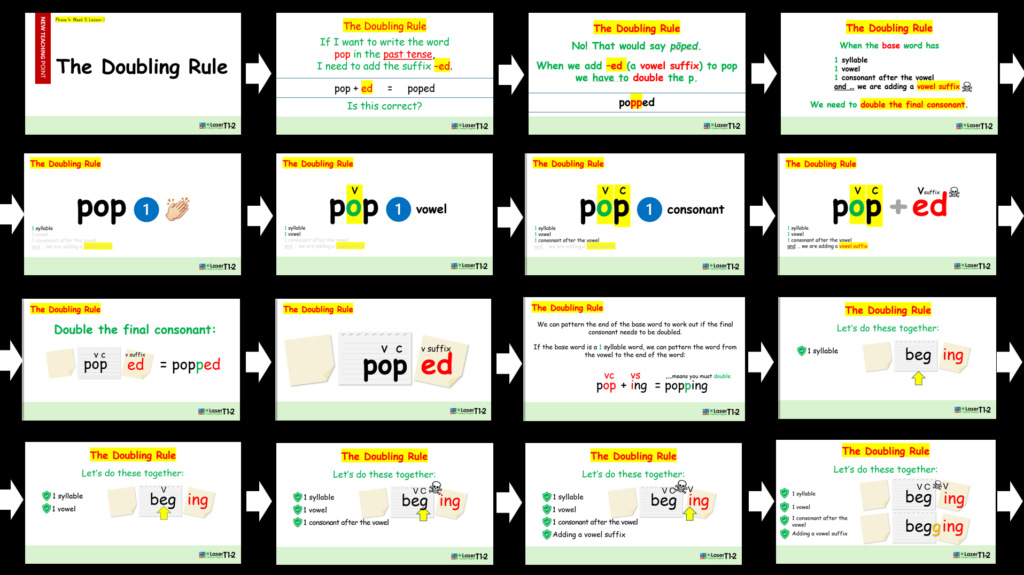
We’ve carefully designed slides to introduce one element at a time, so you can step students through concepts. The image below shows part of the gradual progression for teaching the 111 doubling spelling rule. You’ll notice that only one new element appears on each slide per click, and we’ve worked hard to manage cognitive load.
It’s your job to create the teaching script so that what you say and the slides work well together to deliver a clear, understandable explanation. This takes preparation and a little rehearsal before you teach the new teaching point.
New Teaching Point - Morphology
The section on Morphology lessons will go into greater detail; however, as with GPC and Spelling rule/concept, New Teaching Points, allow the slides to guide your explanation and do some preparation before teaching it for the first time.
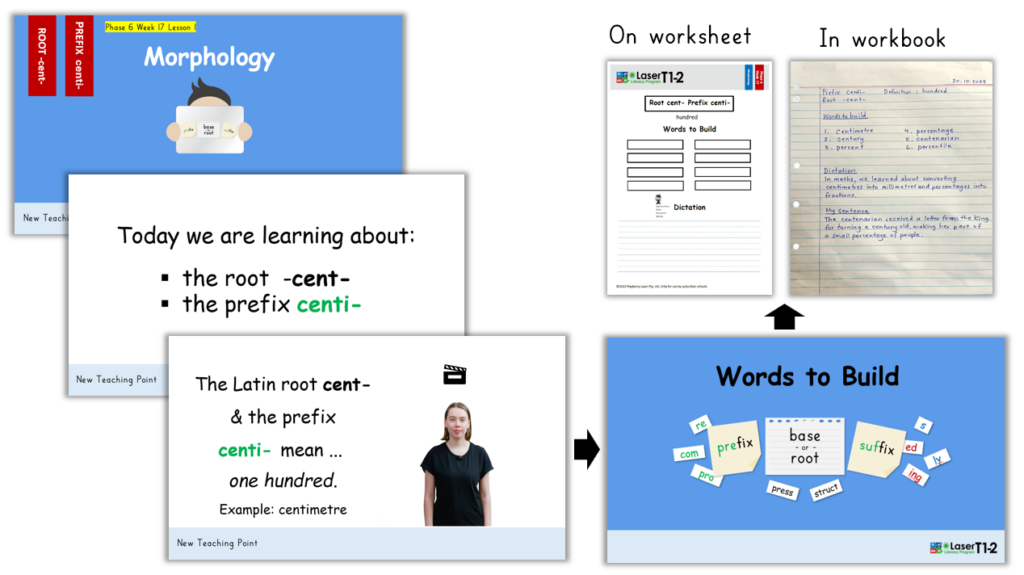
New morphemes are introduced with a clear definition and an embedded video of Millah showing the multisensory gesture for the new base, root, prefix or suffix. Students record the new morpheme and its definition, and then move on to learning and working with vocabulary words that contain the new morpheme.
DON’T WING IT with New Teaching Points
Teaching points you’ve not taught before requires preparation. A bumbling teacher who stops and starts, goes back and forth, and uses too many words adds unnecessary cognitive load to students who are already cognitively loaded by the concept being taught. Prepare with a few run-throughs so your explanations are lean and clear, and work with the slides without bumping against them.
Watch a new Teaching Point in Action
This is Christie-Lee Hansberry teaching a new teaching point to her Year 4 class at St Francis School in Lockleys, SA. Pay attention to Christie’s economy of language and how she maintains student attention by having students respond often.
9. Heart Words
Learning to Read and Spell Irregular Words
Phases, 1-5, 5 minutes
Teaching and reviewing heart (irregular) words with students can be immensely fun if taught well, or torturous if taught poorly.
The first thing we want you to know about heart words is that students will learn to read a heart word a long, long time before the spelling sticks in their brains. Recognition will come to students long before spelling.
The second thing you need to know is that heart words are the hardest words to spell in our language. DO NOT expect all of your students to memorise the spelling of all of the heart frequency words. In fact, it is unkind and unreasonable to expect this. Teachers everywhere stress themselves out over the fact that many of their students don’t spell all the heart words they’ve been taught with 100% accuracy. This is normal. You’ll teach heart words that some of your students may NEVER spell consistently. I was in my forties when I finally learnt to spell ‘necessary’ and ‘bureau’, and I consider myself a good speller!
The video below takes you through the nuances of teaching Heart Words in Playberry Laser.
See a Heart Word Review in Action
Watch Jared Cenrenera and his Reception class from St Ignatius College in Adelaide review Heart Words.
Why do we teach with the Superman arm routine?
These drills create a multisensory (VAK) representation for each word that consists of the following:
- Auditory memory trace of the sound of the word’s spoken letter order (the ear)
- Visual (orthographic) memory trace of the look of the word’s written letter order (the eye)
- Kinesthetic representation – a muscle memory of how the word’s letters feel as they are written in the correct order (the hand).
These three memory traces (V.A.K.) integrate as a routine in long-term memory and support one another for accurate retrieval of the spelling of heart words. You will observe students privately use the routine to cue themselves when they struggle to retrieve a heart word.
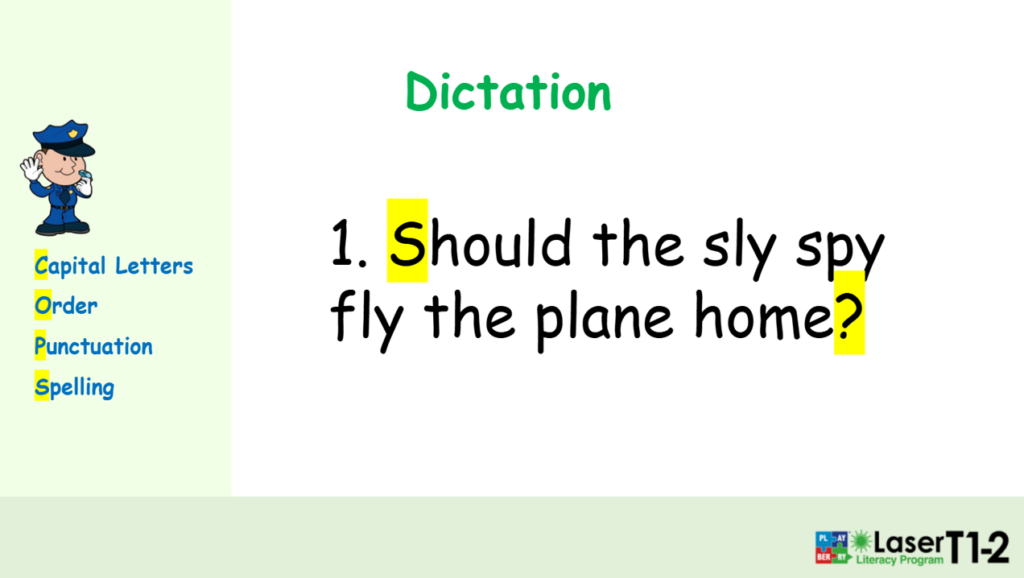
10. Dictation
All Phases, 5-10 minutes
Dictation is the most challenging thing we ask students to do in a Playberry Laser lesson, and really, where the rubber hits the road in terms of students applying what they’ve learned, and thus, imposes the highest cognitive load on students, particularly those students who are still consolidating GPCs, spelling rules, heart words, grammar concepts, and, of course, punctuation.
Some students will handle dictations with ease because they’ve automated spelling the words in the dictation sentences, but others will need support. Because of this, dictation will be where the variance between students will be most apparent, and we need to be on our toes to support the less able students and extend the more able students. Differentiating is key to successful dictations for all your students.
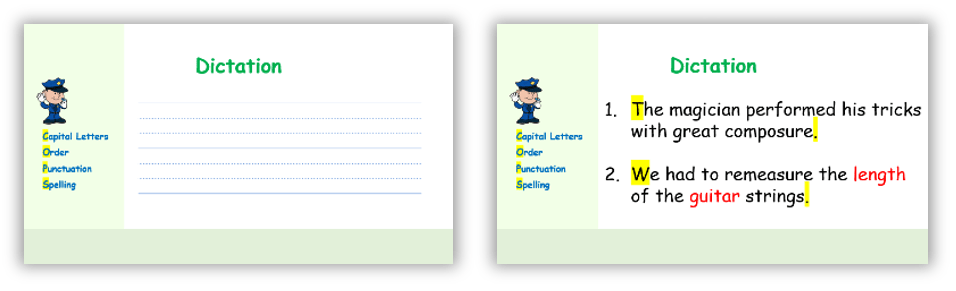
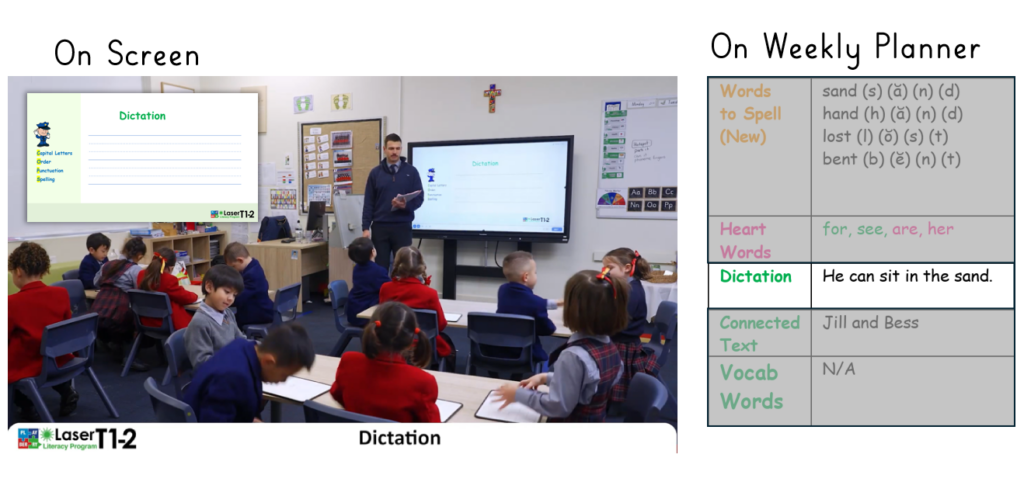
Read the dictation sentences (or sentence parts) from the weekly planner. Because dictations follow heart words, check to see which heart words are in the dictation and allow students to leave those words on their whiteboard to check against when they write their dictation.
How many of the sentences do I get students to do?
A minimum of one, as many as you can fit in! Choose the sentence that is most appropriate for your group. It’s much better for students to get one dictation sentence carefully written and COPS’d than rush through two or more sentences.
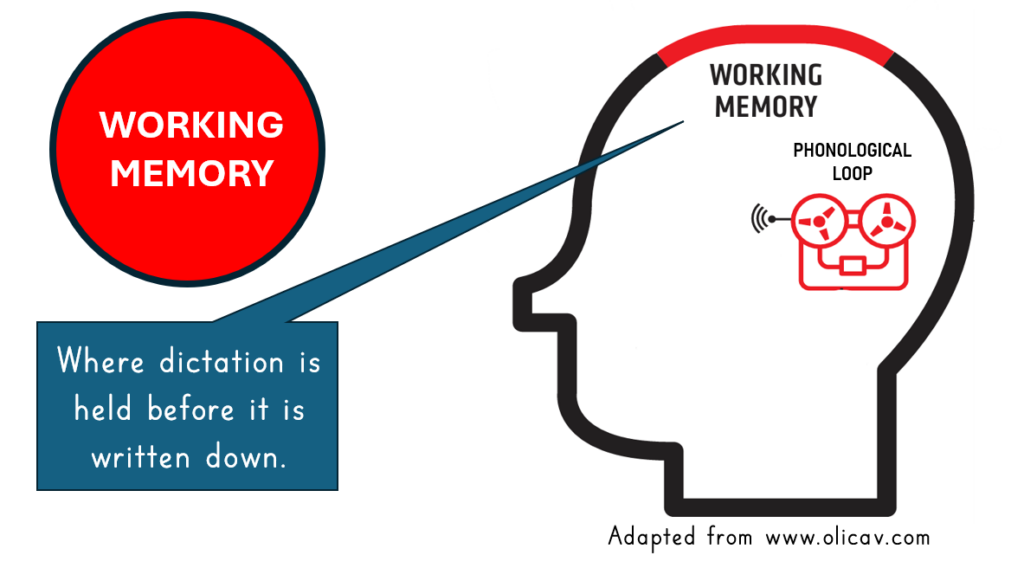
The phonological loop is the part of working memory that holds information we hear. It’s a mental audio recorder that holds dictation while it is being written.
During dictation, students use their phonological loop to its limit, holding sentences or parts of sentences in mind as they write them down. Students listen as the teacher says the sentence or a part of it and repeat it aloud, as many times as the teacher directs. Then it’s over to them to do their best to repeat it inside their mind while writing it. This takes a tight routine and focus.
See the dictation Remembering Routine in Action
Here, Jared and Christie-Lee run the remembering routine with their respective Reception and Year 4 classes. Watch how they demand 100% of students’ attention and participation.
You can use two different routines depending on whether you want students to read the dictation sentences themselves before the remembering and writing routines.
Option 1 (as seen in videos):
- Start at the blank dictation slide
- Read the sentence twice, and students repeat the sentence chorally twice
- Students write the sentence
Option 2:
- Students read the sentence from the screen chorally (twice)
- Click to the blank dictation slide, students get ready to write
- Read the sentence aloud again, and students repeat the sentence twice
- Students write the sentence
IMPORTANT – dictation should be completed in silence for students to hold the words in their working memory

Absolute silence while students are writing their dictation sentences
This means you as well! Any voices in the room will disrupt what students are holding in their working memory, making it hard to remember the sentence or part of it. Students with reading and spelling difficulties will be most affected by voices while writing.
Make sure any feedback you give to students is a quiet whisper at worst and completely silent at best.

Differentiating Dictation
One way to differentiate is by the number of sentences you ask students to complete. Many dictations have more than one sentence, and you can get your less able students to edit their sentences while dictating additional sentences for your more advanced students.
This means that the sentences will be displayed on the screen for students who are editing, and students working on additional sentences will also be able to see their sentences. Keep this in mind and check that the students writing an additional sentence aren’t copying from the screen.
And here’s a very cool resource to stretch your advanced students so they don’t sit with idle hands while the rest of the class completes and edits the standard dictations. We don’t want students sitting around doing nothing because that’s where bad stuff happens! If you search for ‘dictation’ or ‘differentiation for dictation’ in the tier 1 search tool, you’ll find a downloadable PowerPoint file titled ‘differentiation for dictation’.
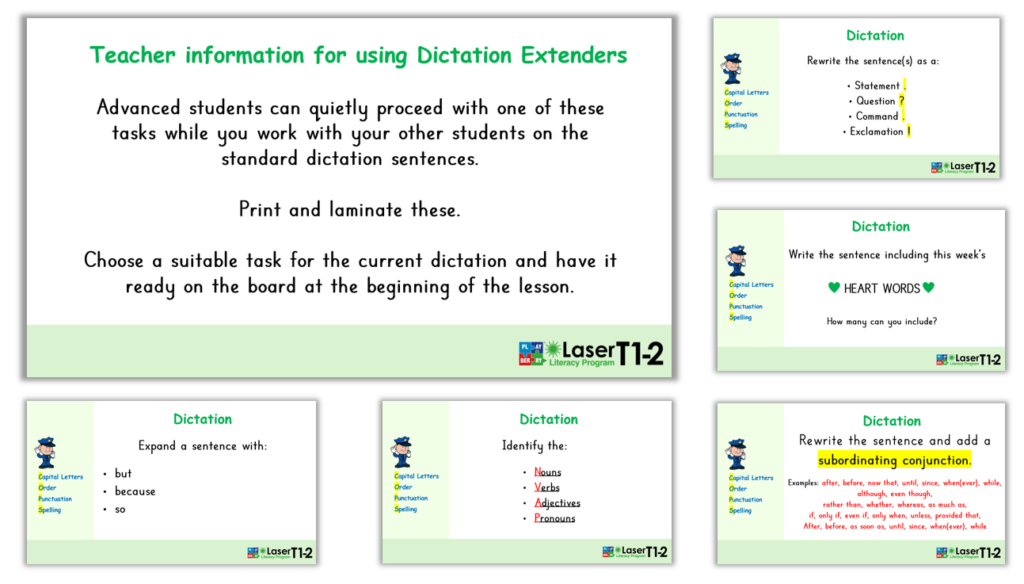
As you can see (above), these are various task types that range from simple parsing to sentence expansion and changing sentence type.
Use these discreetly. Please don’t make a big deal about the extension tasks for ‘advanced’ students. It’s best that students who finish and edit the standard dictation sentences quickly check the extension task on the board and play on.
When all students chin their whiteboards, don’t make a fuss of students who did extension sentences. We don’t want to create an environment where students rush and make unnecessary errors, so they can be among the kids who get to do extensions.
Editing dictations – the COPS routine
The COPS editing routine can be a powerful tool for error analysis and growth, or a waste of time, depending on the routines you build around it and the level of insistence you place on students doing it right! If you’re accustomed to seeing students’ dictations covered with ticks, yet full of uncorrected errors, you can join the club. It’s normal. For students with learning difficulties, it’s to be expected. If your spelling is poor, you cannot recognise spelling that ‘looks wrong’. Because of this, the COPS routine needs to be meticulous.
The video (below) shows Morgan from Star of the Sea School in Adelaide running an exceptional COPS editing routine with her Year 1s.
11. Connected Text & Vocabulary
All Phases, 3-5 minutes
Connected texts are included in all lessons each week. They include previously taught heart words and words containing previously taught phonograms, as well as spelling rules and concepts.
The purpose of connected texts is to develop passage reading fluency and expand vocabulary. In later phases, most of our connected texts are informational and are written to build students’ knowledge.
All connected texts are downloadable as PDF files for at-home reading, fluency pairs (search ‘fluency’), or as a stimulus for other learning tasks.
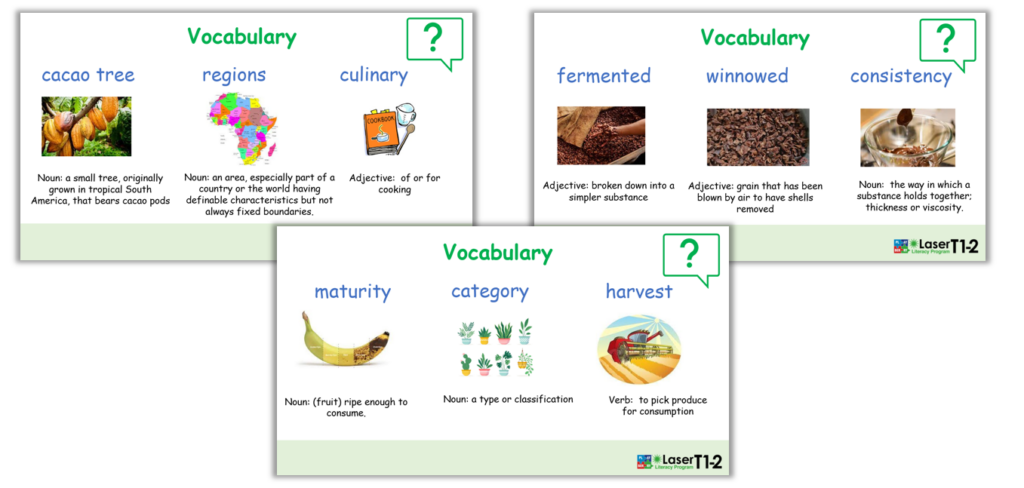
Vocabulary Slides
Before each lesson’s connected text, you’ll see a slide containing some definitions of any specialist vocabulary. It’s up to you how much focus you place on defining each word. We’ve included basic definitions that you can have students read, or you can read with or to the students. If you and your students have focused on any of these words in other vocabulary work, make links to that.
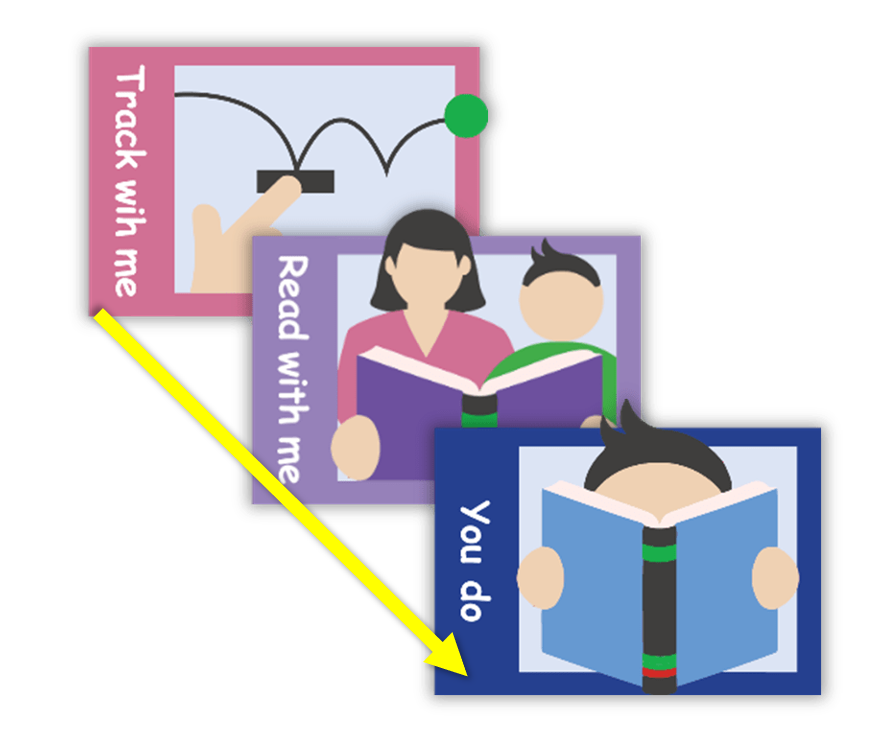
Gradual Release of Responsibility
Gradual release of responsibility is the overarching model used with connected texts.
If we begin with the end in mind, our ultimate goal is for the class to read the connected texts chorally and fluently from the screen.
Automatic word recognition and fluency
Fluent reading is a complex mix of skills that begins with the ability to recognise words in a text automatically. This means that fluently read words are literally read at the speed of sight. For these words, the essential decoding work has already been done by the reader in the past, and these words are now stored (or orthographically mapped) in the reader’s brain in a tight neural network of the word’s letter order, sound and meaning.
By the time a connected text comes around, students have had plenty of practice reading and spelling many of the words and word parts that appear in the connected text. This doesn’t guarantee that all students will be able to read every word automatically. In every class, students fall along a continuum of ease in reading the connected text.

Choral Reading is a Team Effort
Class reading supports students who haven’t yet orthographically mapped all words. As they read along, they hear peers pronounce unfamiliar words; if they are looking at the word at the same time, this provides another critical exposure to its written and spoken form, helping secure it in memory and move it closer to orthographic mapping.
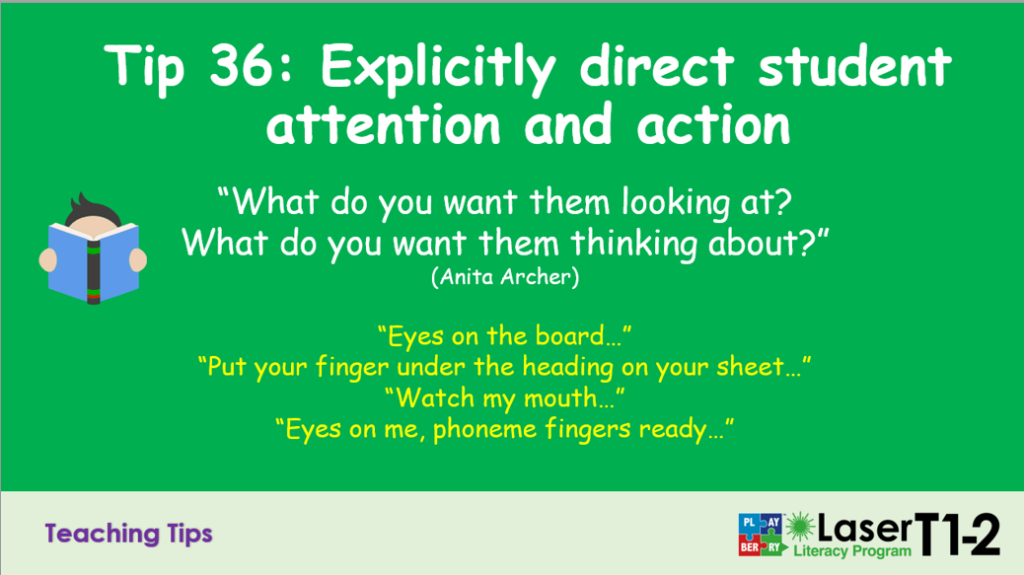
“Eyes on the text”
Orthographic mapping requires students to see and hear a word. Make sure all students are reading (or tracking if they don’t know a word). When we allow students to look away from the connected text, they miss critical opportunities to map words orthographically. This has a devastating impact on vulnerable readers, depriving them of opportunities to expand their sight-word bank.
Watch Connected Text Reading in Action
Jared from St Ignatius College in SA with his reception (prep) students. Jared does an “I do”, followed by a “You Do”. This is common with younger classes. during the “I Do”. When students read without him in the ‘you do’ phase, even though the camera angle doesn’t show it, Jared’s eyes are on the students, making sure they know he is watching and expecting full participation.
Adam from Star of the Sea School in SA sets out the expectation of full participation at the start and informs students that he will be watching them as they read. Adam points out and gives students a practice decode of two words: ‘productivity’ and ‘innovative’, as he anticipates not all students will have orthographically mapped these words.
Morphology Lessons
Playberry Laser has a standard morphology scope and sequence that is taught within the phonology scope and sequence from phases 2-5. Phases 6 and 7 lessons are entirely morphology-based word study lessons. In phases 2-5, dedicated morphology lessons are on day 4 of the weekly lessons.
Our standard morphology lessons consist of:
- Introduction lessons, where a new morpheme (prefix, suffix, base or root) is introduced as a new teaching point
- revision lessons, the following morphology lesson, in which the newly introduced morpheme is consolidated along with morphemes from previous weeks.
In phases six and seven, a new morpheme is introduced every lesson.
In Playberry Laser, we have two morphology curricula. The Standard morphology curriculum and another curriculum that we call Catch-Up morphology.

Standard Morphology Lessons
Standard morphology lessons fit within the Playberry Laser scope and sequence from phase 2 to phase 5 and dominate phases 6 and 7. We call these ‘standard morphology lessons’ because they are in their standard place in the broader program scope and sequence.
A cohort that starts Playberry Laser at phase 2 or lower will naturally begin their standard morphology learning normally in phase 2 at the start of the morphology sequence. Their knowledge of morphology will progress in a standard way as they move through the scope and sequence. We’ll have a look at what goes into standard morphology lessons soon.
Standard morphology lessons consist of:
- Introductory lessons, where a new morpheme (prefix, suffix, base or root) is introduced as a new teaching point
- revision lessons, the following morphology lesson, in which the newly introduced morpheme is consolidated along with morphemes from previous weeks.
In phases six and seven, a new morpheme is introduced every lesson.
Morphology Lessons in the Scope and Sequence
Phase
Where the standard morphology lessons are in the week’s lessons…
2-3
The fourth of the five weekly lessons (lesson 4)
4-5
The fourth of the four weekly lessons (lesson 4)
6-7
Every Lesson (lessons 1-3)
We’ll look at Catch-Up morphology lessons and then the components of a standard morphology lesson

Catch-Up Morphology Lessons
When a school starts with Playberry Laser, all cohorts above phase 2 will not have received morphology instruction aligned with our scope and sequence.
These students will need to be caught up on the morphology instruction they have missed. Morphology catch-up lessons have been developed to get them up to speed.
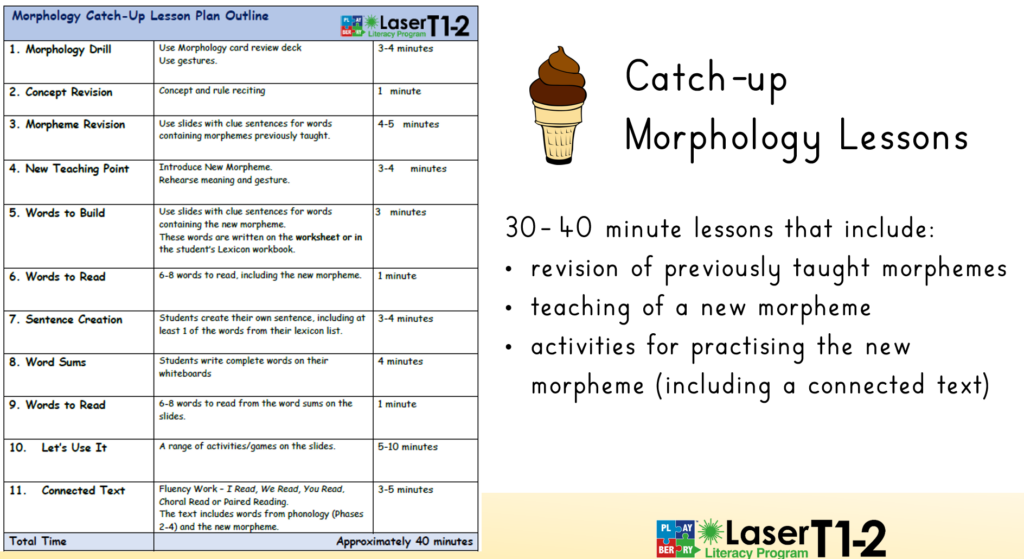
Morphology Catch-up lessons are 45-minute lessons that include revision of previously taught morphemes, teaching a new morpheme, and activities to practise the new morpheme (including a connected text).
45 Catch-up lessons cover morphology from Phases two to four. These lessons replace the standard morphology lesson within the class’s phase.
How do I slot Catch-up Morphology Lessons into lessons?
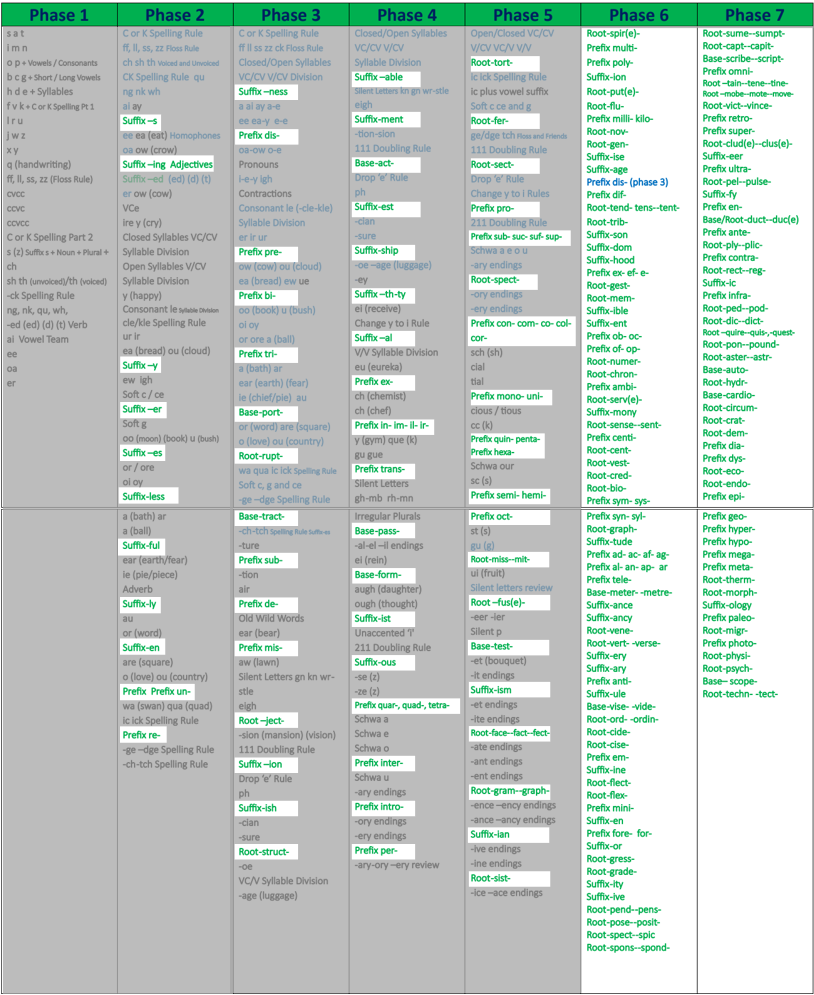
To explain this, let’s imagine you’re teaching a class that is starting Phase 3, and it’s the school’s first year using Playberry Laser. This means that your class did not receive any of the Phase 2 morphology and needs to be caught up before starting the standard morphology lessons in Phase 3. If you look at the Scope and sequence (above), you’ll see that your class have missed lessons on suffixes:
-s, -ing, -y, -er, -es, -less, -ful, -ly, -en, as well as prefixes -un and re. (all Phase 2 morphology content)
There is a lot of content to catch up on.
In the embedded video (below), you can see weeks 1-6 of the Phase 3 scope and sequence. Weeks 2, 3 and 4 have standard morphology lessons at lesson 4. The problem is that you can’t start your class on Phase 3 morphology; you need to catch them up on Phase 2 morphology.
At the bottom right of the screen, the Catch Up Morphology curriculum for lessons 1-8 is visible. When you play the video, you’ll see how the catch-up lessons replace the standard morphology lessons for weeks 2, 3 and 4 of the year. This process of replacing standard morphology lessons with the catch-up lessons will continue until you have caught your class up to where they need to be in the standard morphology curriculum.
You’ll need to keep an eye on the phase 3 scope and sequence so you know when you’ve caught your class up, and you can stop the catch-up lessons and revert to the standard morphology lessons.
Where do I find the Catch-Up Morphology Lessons?
When running a Catch-Up Morphology lesson, you will have to open the lesson slides. The catch-up morphology lessons are in with the phase lessons.
Just open them up, and you’ll see there are 56 catch-up lessons that will cover all of the morphology content to nearly the end of phase 5.
Recommendations for Classes beginning in Phase 3 or 4
Class at Phase
Morphology Catch-up Lessons
3
Lessons 1-12 (12 lessons) These are all the phase 2 morphemes
4
Lessons 1-27 (27 lessons) These are all the phase 2 and phase 3 morphemes
5
Because there are 46 weeks of morphology lessons to catch up by the beginning of Phase 5, use your discretion about which morphemes you teach to your class. It’s highly unlikely you’ll catch the class up unless you decide to teach 2-3 catch-up lessons per week outside of normal Playberry Laser Lessons.
Can I do multiple morphology catch-up lessons in a week to get my class up to speed faster?
You can knock yourself out if you have time! Obviously, take your class’s needs into account, and remember that by increasing the rate of learning, you’ll need to increase the amount of review to consolidate that new learning. Otherwise, content just won’t stick. Catch-up morphology lessons don’t have the teach-review 2-weekly cycle that the standard morphology lessons have.
Watch a full Catch up Morphology Lesson in Action
Standard Morphology Lessons
Teaching Morphology Lessons
Whether you’re teaching catch-up or standard lessons, morphology lessons are a little less structured than phonology lessons. You have the scope to allow some exploratory discussions about words, not just those containing the new morpheme, but also other morphemes that pop up in the studied words. The anecdote below illustrates how morphology lessons generate teachable moments that are worth pursuing.
In a catch-up morphology lesson to year six students on the prefix de- (from phase 3, week 23), following the introduction of de-, I asked students to share what words they believed had the prefix de-. One student responded with ‘decapitate’. Suddenly, we were discussing the root -capt- and -capit- (not taught until phase 7, week 2). Students took delight in discovering that ‘decapitate’ means the head going away from the body! Students were offering words like captain, captive, and caption, and seeing how -capt-/-capit- related to being taken, held, head, or leader, depending on the word. Whilst not allowing the lesson sequence to be derailed, this was a teachable moment too critical to miss. It only took an additional minute but brought much joy and engagement, as well as front-loading for the future teaching of -capt- and -capit- in phase seven.
You can always choose to do some additional morphology, inspired by a Playberry Laser lesson, at another time during the school week.
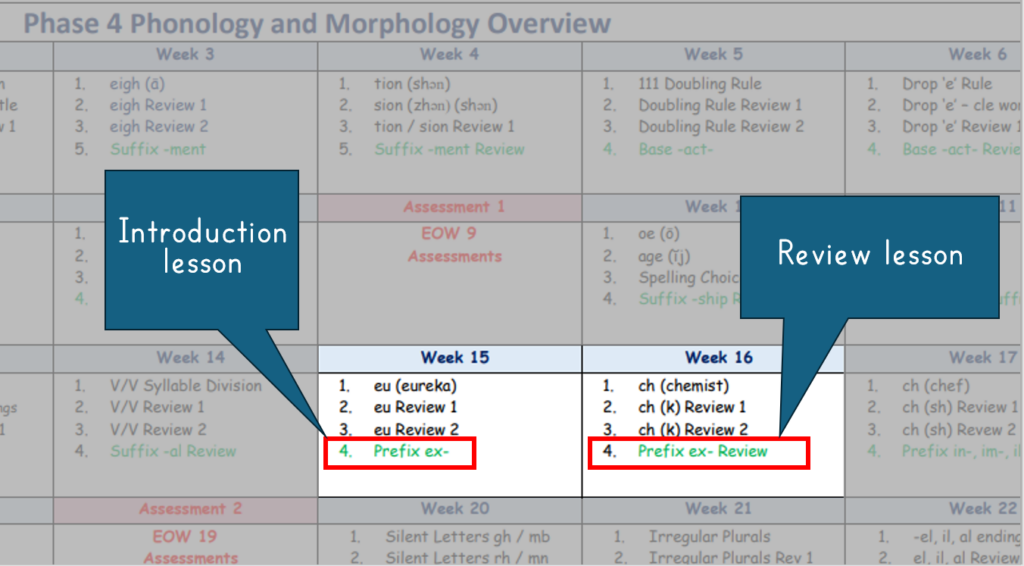
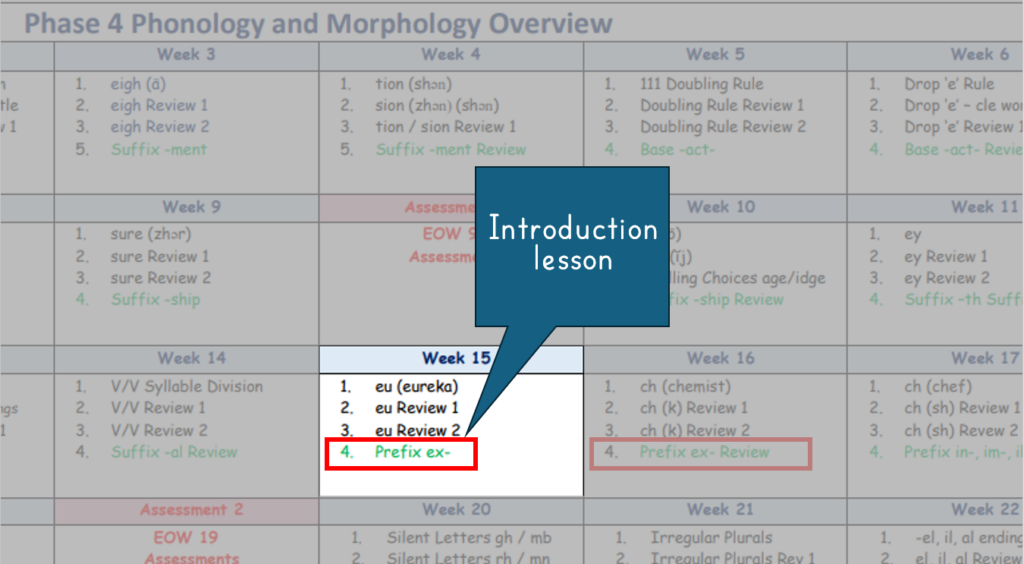
Standard Morphology lessons teach each new morpheme over two lessons. The first lesson (introduction) introduces the new morpheme, and the second lesson (review) consolidates it.
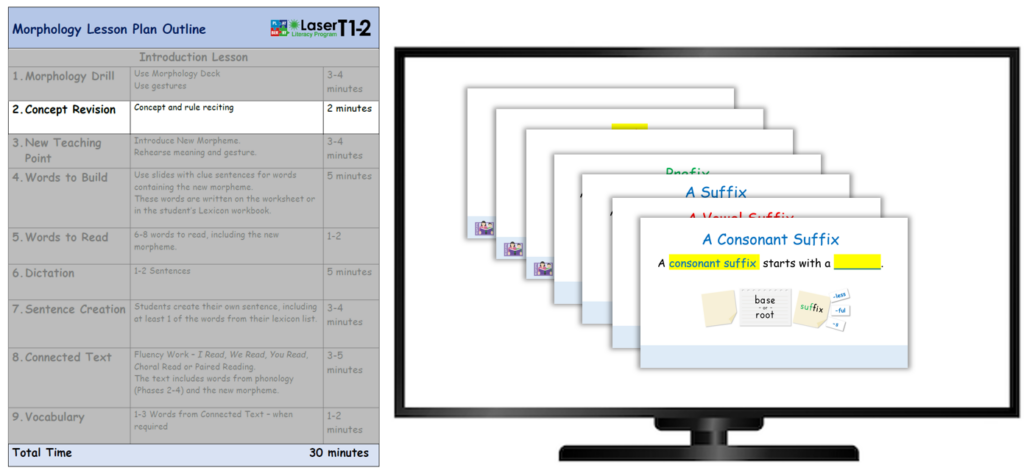
Introduction Lessons
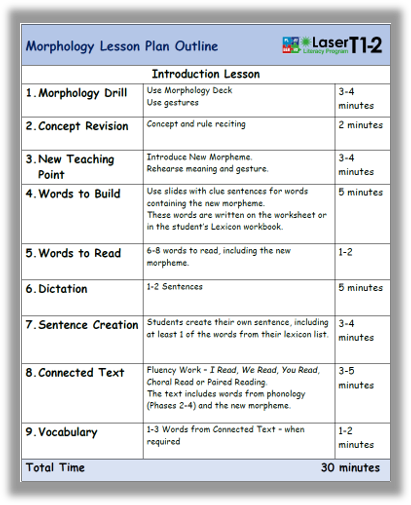
1. Morphology Card Drill
Using Morphology Deck and multisensory gestures
3-4 minutes

This is a multisensory routine in which students see the morpheme (on the front of the card), chorally recite its meaning, and make the multisensory gesture simultaneously. This drill is repeated in all morphology lessons to the point of automaticity and over-learning. The gestures on the back of the cards are only suggestions. A class can make up their own. Just like reading card decks, the morphology deck will only have morphemes that have been taught so far.
Morpheme cards are added to the deck once a morpheme has been taught as a new teaching point from the slides. The deck grows as each new morpheme is introduced. When the deck becomes too big, it can be halved, with each half reviewed in alternate lessons.
When retrieving a card has become fast and automatic, move that card to a separate review pack for weekly or fortnightly revision. If a morpheme has been forgotten, it can be reintroduced to the review deck at any stage.
Daily review routine:
- shuffle the deck
- hold the deck facing the class – students will see the front card
- Students say the type of morpheme as part of the routine:
“Prefix dif- means not.”
“Root word -flu- means to flow.”
We strongly recommend that students spell suffixes out using letter names. This makes it more likely that suffixes will be spelt correctly:
“Suffix i-s-e means to become like.”
“Suffix e–d means verb past tense.”
Just like with reading cards, cards are placed down in one of two decks as they are completed. If a few students make an error, or the group is generally slow to retrieve a morpheme, place the card into a second pile and carry on. When the deck is complete, redo the cards placed in the second pile.
The clip below is of Morgan and her Year 1s from Star of the Sea on SA, and Christie Lee and her Year 4s from down the road at St Francis School at Lockleys.
See the Morphology Card Drill in Action
Notice how students use gestures to help retrieve the morpheme definitions. This is an important multisensory routine that not only assists students in storing and retrieving definitions but also brings some life and fun to it.
Like with the Reading Card Deck, aim to bring the class up to a fast pace and keep them there. Otherwise, the pace will drop to an unengaging groan! The class must not be held to the pace of the slowest students. All students attend better if the pace is maintained. Going too slowly causes a drop in student attention.
2. Concept Revision
Concept and Rule Recitation
3-4 minutes
Morphology concept slides are read or recited aloud chorally with the whole class. Like the review and retrieval section in phonology lessons, this is fast-paced, no-passengers, and you watch students and push for 100% participation.
As with phonology rules and concepts, the slides begin with the complete rules or definitions and then fade to keywords being blocked out, requiring students to retrieve them.
The recitation of rules must be fast-paced; otherwise, engagement will be lost.
Watch Concept Revision in Action
Watch how both Adam and Christie-Lee monitor the students to ensure 100% participation. Adam also checks the understanding of the use of red on vowel suffixes. Many don’t realise that we chose red because vowel suffixes are dangerous because you might need to use a spelling rule when adding them, and consonant suffixes are blue because most of the time, you can just add them to the end of base words without any changes to the base or the root’s spelling.
3. New Teaching Point
Introduce New Morpheme
3-4 minutes
The slides guide you through the introduction of the new morpheme. Use the language from the slides. No fluff required. Each morpheme has an embedded video on the new teaching point slide (below) where Millah demonstrated the multisensory gesture for the new morpheme.
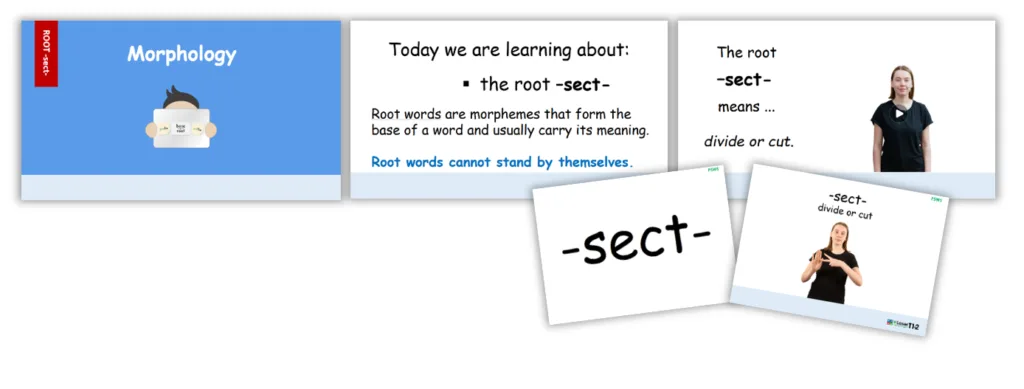
Teaching Sequence

The teacher reads the learning intention from the screen and students listen, e.g., “Today we are learning about the root -sect-”.

The students and teacher then read the learning intention together.
The teacher reads the meaning, e.g., “The root -sect- means divide or cut”.
The students and teacher then read the meaning together.
Watch a new morpheme being taught
This is Christie-Lee at St Francis School, Lockleys, teaching her class the suffix –ion.
Christie teaches from the slides and doesn’t give a long-winded explanation. Instead, she is economical with language and immediately gets the students active with choral work, followed by two rounds of pair-share and cold calls to check for understanding of vowel suffixes.
4. Words to Build
Students create their own sentence, including at least one of the words from their lexicon list.
IMPORTANT: Review the words to build slides before the lesson so you know them before students and can give clues.
5-10 minutes
Here, we work through the slides. Students read and record words containing the new morpheme.
These words are written in the provided worksheets (in the resources section) or in a student workbook (the lexicon book), serving as a record of morphemes and example words.
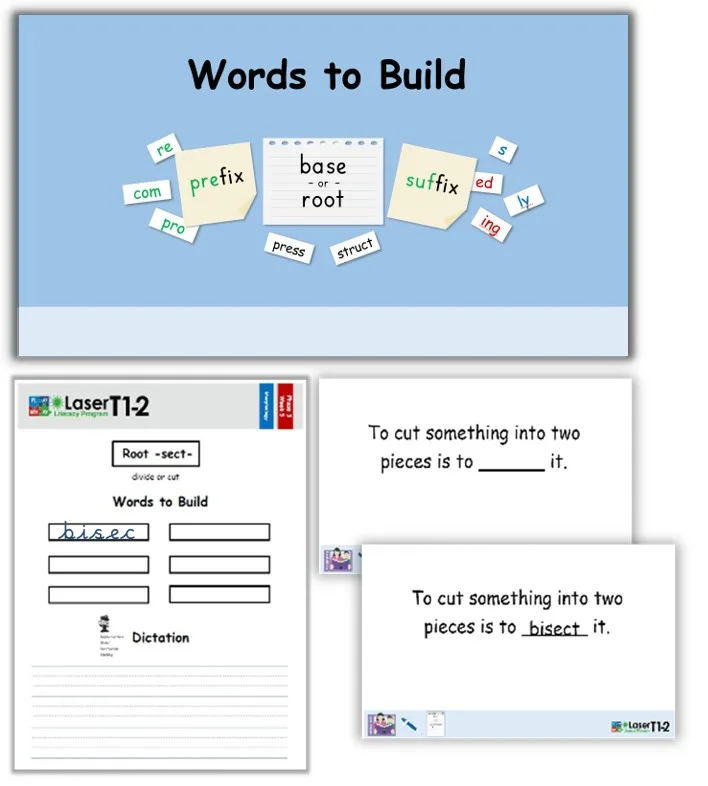
Teaching Sequence
If students are recording the new morpheme in their books (not the worksheet), they need to begin by setting up their page by writing the morpheme at the top with its meaning. The words to build will be listed below.
IMPORTANT: Review the words to build slides before the lesson so you know them before students and can give clues.
The students and teacher then read the definition and word from the slide, e.g., “To cut something into pieces is to …….. “bisect it”
Students attempt to find the word in their own vocabulary. For higher-level vocabulary words, slides prompt students with either a set of three words to choose from or part of the word is on screen to cue students.

The students record the word neatly in their workbooks or worksheets.
This is repeated for all Words to Build slides. Some words in the set may need a little explaining as the morpheme’s meaning may not be as transparent as in other words.
Turn and talk may be used for students to discuss possible meanings, and non-volunteers can be asked to respond to questions. It’s essential to ask the question to the whole class before using pop sticks to call on a non-volunteer to respond. Refer to the TAPPLE (EDI™) method.
Watch Words to Build in Action
Christe-Lee begins by getting students to set up a new page in their lexicon books for the new morpheme – suffix ‘-ion’
The class has built a routine for writing words into their lexicon books. The expectation is that students don’t talk after they finish their word (so other students can be silent as they spell). Students have been taught to signal they have finished writing a word by looking up.
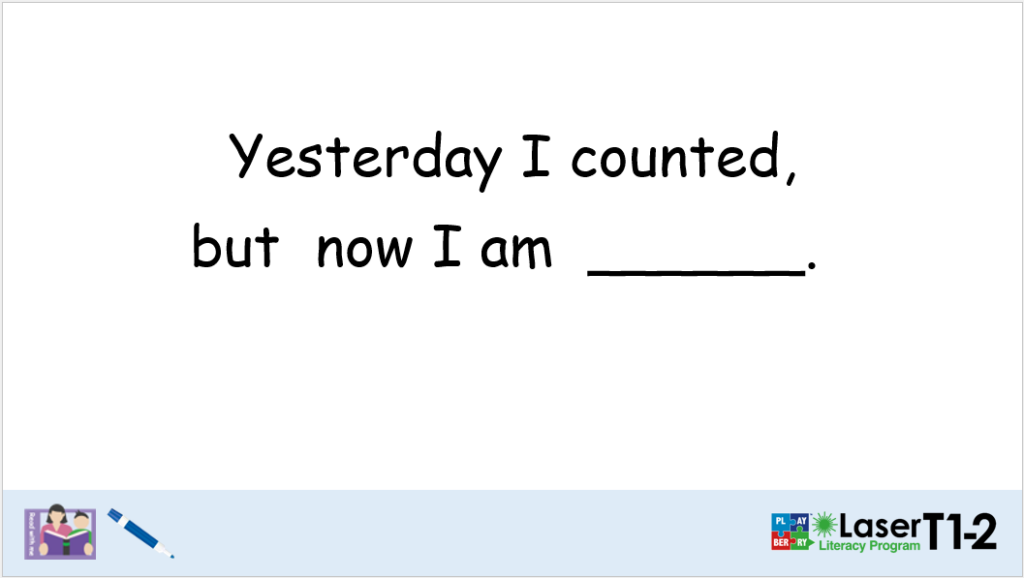
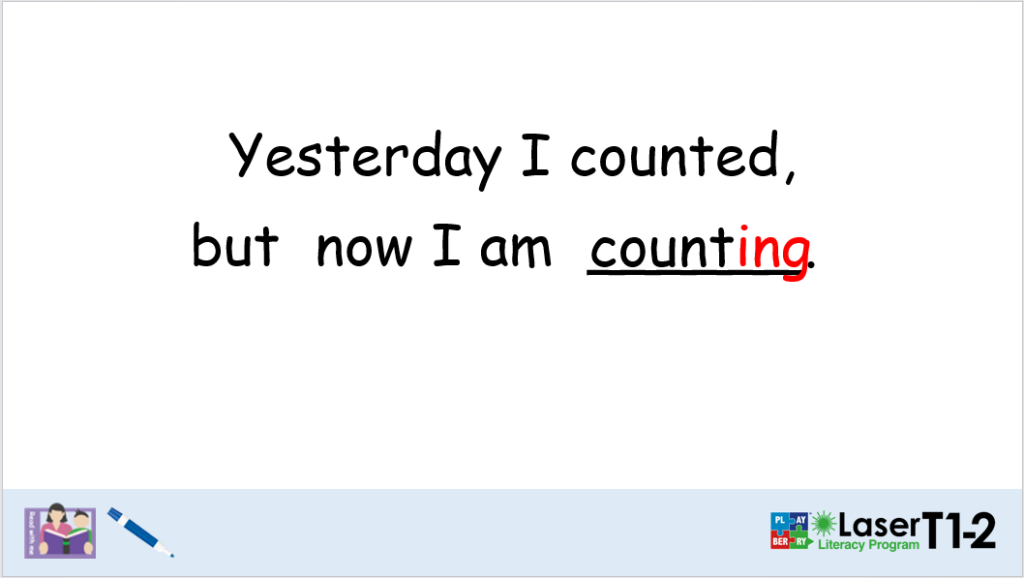
5. Words to Read
30 seconds – 1 minute
Words to Read is quick. Students read from the screen the words they’ve just written into their lexicon. If errors occur during choral reading, prompt the class to reread (decode, if necessary). At the end, you can use pop sticks to ask questions and check whether students understand these words and their meanings.
The morphology dictation routine is identical to the phonology dictation routine. Go back and re-read the dictation section to remind yourself of what makes dictation hummmmmmmmmm!
7. Sentence Creation
Students create their own sentence, including at least one word from their lexicon list.
3-4 minutes
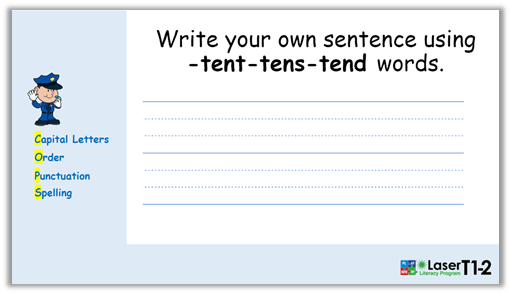
Straight after dictation, students will create a sentence of their own (perhaps more for your advanced students) using words containing the new morpheme they’ve learned. Students can refer to the words to build list they completed in their lexicon books earlier in the lesson.
Students really enjoy flexing their lexical muscles here, and as you’ll see in the video in a moment, are often keen to share their sentences with the class.
Sentence creation can be taken in any direction you like, depending on what you have been working with in terms of sentence types. If the class was doing the lesson on -tent- -tens- or -tend-, you might ask students to:
- Write a simple sentence using a -tent- -tens- or -tend- word.
- Write an expanded sentence using but, because, or so with as many -tent- -tens- or –tend- words as possible.
- Write a compound I, fanboys I sentence with as many -tent- -tens- or -tend- words as possible.
- Write a complex ID sentence with as many -tent- -tens- or -tend- words as possible.
- Write a complex D,I sentence with as many -tent- -tens- or -tend- words as possible.
Students can be asked to practise any sentence types they have learned during this activity.
Watch Sentence Creation in Action
8. Connected Text
3-5 minutes
The text includes words from Phonology lessons (Phases 2-4) and words containing the new morpheme.
Connected texts are included in each lesson, including words containing the new morpheme, heart words and words with previously taught phonograms, spelling rules and concepts. The purpose of these texts is to develop passage-reading fluency and expand vocabulary.
100% participation is the expectation, with students tracking when they don’t know a word and reading aloud when they do. Remember to keep your eyes on the students. Jump in and out when you need to model pace or prosody.
Download Connected Texts
Each new morpheme has a connected text. It can be found on the downloadable Connected Text document for the corresponding Phase and Week. This is in the Resources section of the platform. You can search using the name of the morpheme. The Connected Texts can be used for fluency reading pairs, homework, and Tier 2 reading groups to support students’ reading.
OPTIONAL: Morphology Independent Task Cards
There are Morphology Task cards for each Morpheme.
These use the connected text to reinforce the new Morpheme. These can be set for independent work or as homework. Just type ‘morphology tasks’ in the search bar on the Tier 1 resources page.

9. Vocabulary
1-3 Words from Connected Text (when required)
1-2 minutes
Some lessons have a vocabulary slide that defines any tier two or three vocabulary words used within the Connected Text for that day.
These can be discussed with students within the lesson. The teacher can also use them in more depth within other vocabulary teaching.

The main difference between introductory and review lessons is that a review lesson is slightly shorter (around 5 minutes shorter).
Students work entirely on whiteboards in review lessons, and review lessons contain some activities that you don’t see in an introductory lesson – a morphology review, word sums, and Let’s Use It.
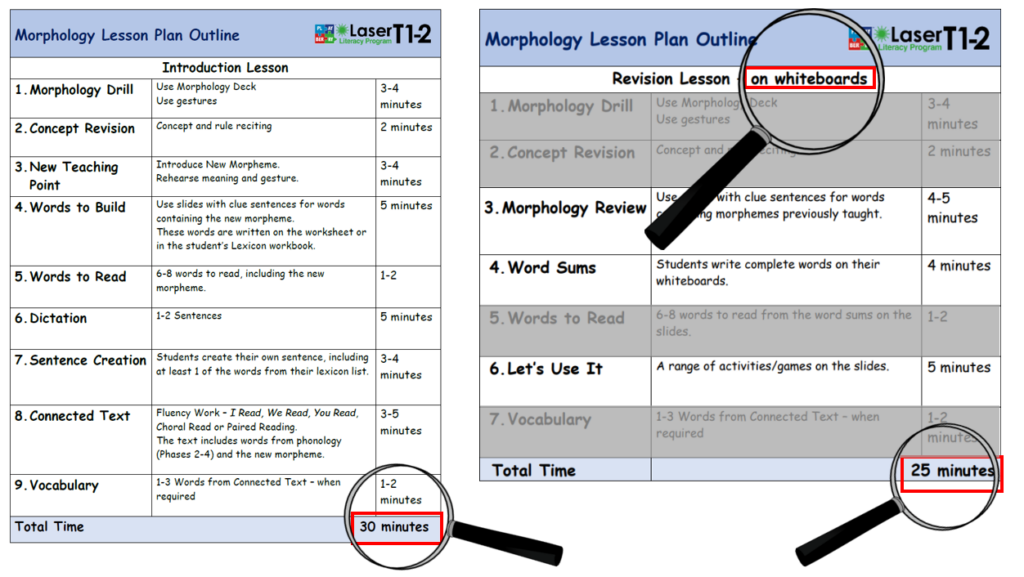
1. Morphology Review
4-5 minutes
The morphology review is a review in which students retrieve and write words based on definitions or sentences containing keyword clues. You can read the clues or lead a choral read. As in all parts of Playberry Lasser lessons, don’t do the work for the students if you don’t need to.
Get the students to do the reading whenever you can.
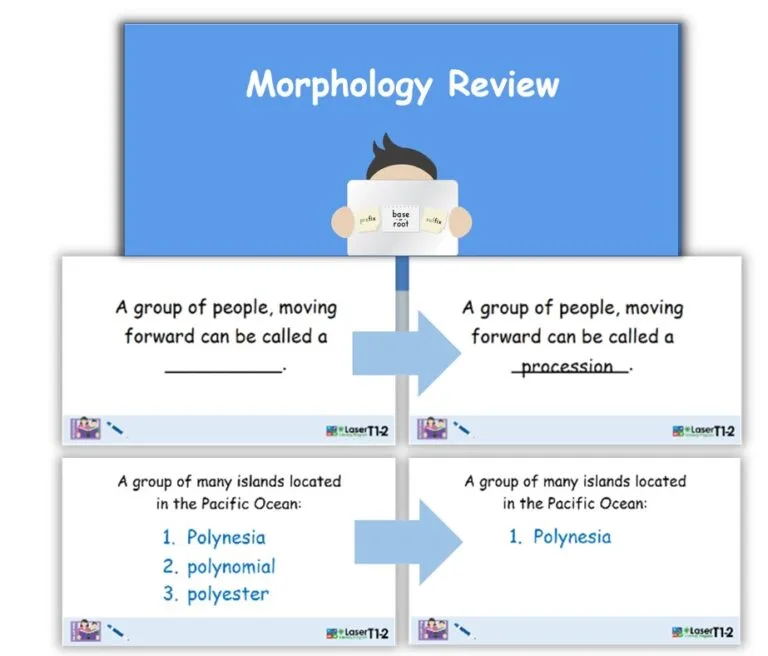

The teacher and students, or the students, chorally read the definition from the screen, e.g., “A group of people moving forward can be called a…”.
Students write their choices on their whiteboards; choose a non-volunteer (who has a correct answer) to share their word with the class. Students make any necessary corrections.

Alternatively, you might ask for a pair share where students decide on an answer together and record it on their whiteboards.
As we go through the phases, the review slides change in appearance and become more sophisticated in the morphological knowledge they demand of students. Students draw on the morphological knowledge/vocabulary they’ve been developing since phase two.
Watch a Morphology review in Action
2. Word Sums and
Words to Read
4-6 minutes
Word Sums require students to put morphemes together and sometimes be aware of the spelling rules they’ve learnt.
The students simply write the answers to these sums on their whiteboard. Often, teachers have a set amount of time for this slide so that most students can get them all written. Some students may write 3 or 4 words in the time, and others (in the back row) may finish and write other words with the suffix -ly as an extension.
The next couple of examples are from higher phases – you will only see these in Phases 6 and 7 (so don’t panic!)

Jolly Roger and his evil laugh
The Jolly Roger and evil laugh signal when any of the sums have an e dropped, a consonant doubled, or a ‘y’ changed to an ‘i’.
Word sums get students thinking about the meaning of the morphemes that make up words as well as the orthographic conventions that dictate how they come together in spelling.
3. Let’s Use It!
5 min – 30 min
This range of engaging activities gets students working individually or in pairs, driving student thought and getting them to put their knowledge of word parts to work in a broader knowledge-building context.
Activities can be completed on student whiteboards or in Lexicon student workbooks. You can check for understanding during the lesson or collect workbooks for marking.